

ACParadise Network:
American Cosplay Paradise
American Cosplay Experience
American Cosplay Snapshots
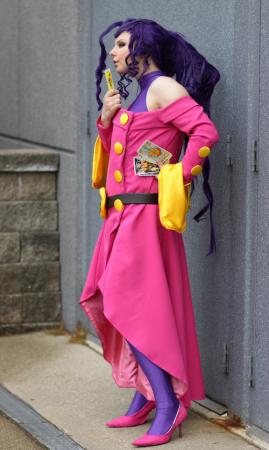
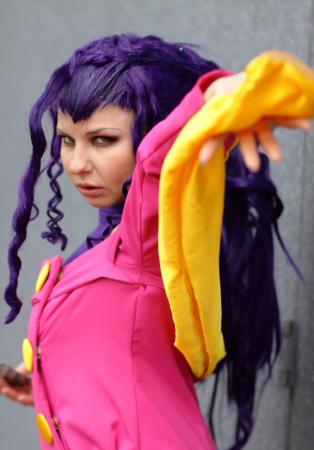
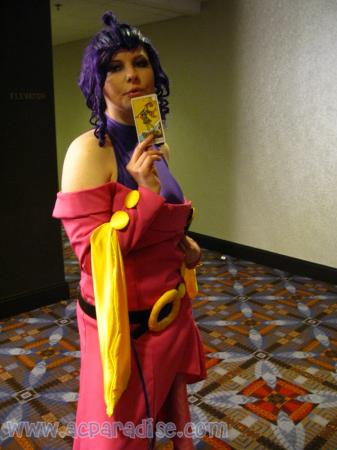
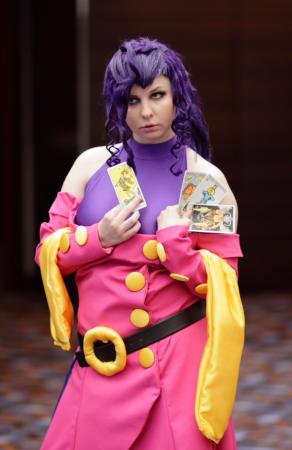
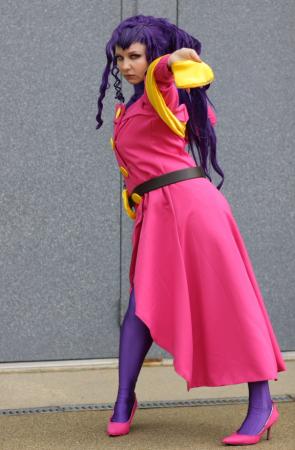
Cosplayer Chunlichan > Costume of Rose (Street Fighter IV)
- Most Recent Photo
- 05-29-2011
- Series
- Street Fighter IV
- Character
- Rose
- Year Completed:
- N/A
- Construction Difficulty:
- Difficult
- Costume worn at:
- Anime Central 2011
About this Costume
- Construction Details:
-
I made the bodysuit out of stretch-knit active wear. I decided to make it two pieces so that I would be able to use the bathroom without having to remove the entire costume...in order to do this, I made a pattern for the bottom from a pair of jeggings that owned, and the top part was made from the same pattern (I love that pattern!) that I made my June's top from, just altered it a bit more. I also added snaps to the bottom of the bodysuit for the aforementioned reasons. The jacket was actually the hardest part. If you look at the art styles of all of the Capcom artists, apparently even they don't know how those arms are supposed to look. Some have them poofy, some aren't, etc. The one I decided on ended up having the seams under the arm pits, and it was hard as hell to alter that jacket pattern, so I asked for my sister's help (thanks!!) to make hide or hair out of it. After the pattern was worked out, it was just a matter of sewing it all together, making a lining, and lining the jacket. This was the first time I've lined a jacket, so it was a fun process to learn (and pretty easy!) The fabric used for the jacket was a jacket fabric, it was hard to find a bolt with 8 yards on it, I finally found one at Vogue in Evanston, Il, I highly recommend that place! I made covered buttons from 72" coverable buttons since Rose's buttons are freakishly large. Apparently none of the Capcom artists can decide how many buttons she has down the arms, so I looked in the art book and in about 95% of the artwork she has 3 down from the elbow, so I decided on that. (even Ikeno's art apparently varies in how many buttons Rose has in SFIV - some have twice that many, most only have 3!) I used the same yellow fabric to make a scarf which I inserted el-wire piping into so that it would light up (even though you can't see it in these pictures b/c it's too light outside...). I also made a "plush" belt buckle for the belt (ya know, 'cause it's freakishly huge). I had bought leather to make a belt from, but I then discovered that I already had a belt in my fabric scrap pile. Yay! So I just used that. Lastly, the shoes were bought from Goodwill for 2 bucks and covered from the same fabric as the jacket so that they would match perfectly (they were originally silver in color). I think that is all. Man, that was a lot of work! I'm so happy how this turned out tho!
- Personal Thoughts:
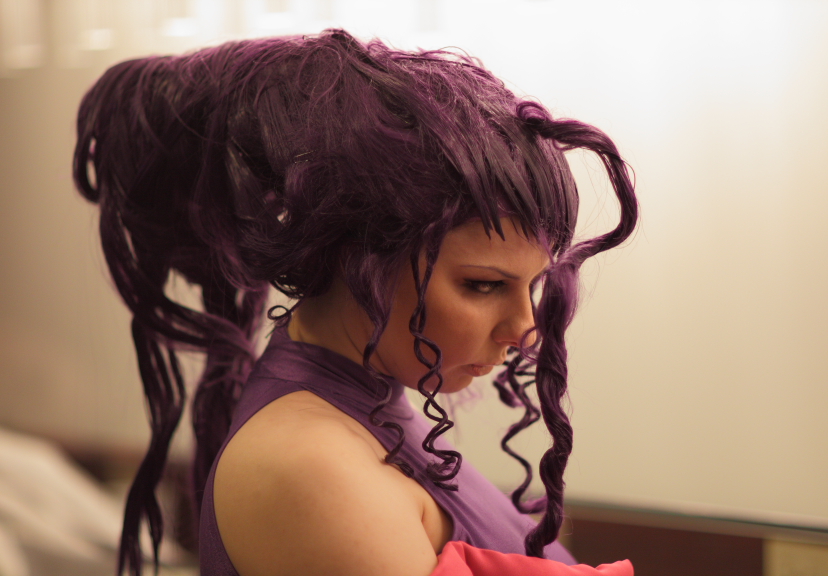
- These new Premium Cosplay.com wigs are freakin' amazing. BUT, because they are heat resistant, they need high heat to add and sort of ringlets, etc. So, I needed to be careful not to slag the fiber, but also to add enough heat to get the ringlets to stay. Sheesh.
Wig Details
- Wig Brand
- Cosworx / Cosplay.com
- Wig Name
- Amanda
- Original Color:
- Violet Purple
- Styling Time
- 20 hrs
- Styling Notes
- This wig was in-freaking sane. I wanted it to accuratly look like Rose's hair, so I went all out. I used TWO cosplay.com premium wigs. One was just to harvest wefts from. First, I covered a hollowed-out styrofoam triange with purple knit fabic (same I used for the body suit in my costume). Then I sewed wefts to that, which turned it into something looking like a partyhat, lol. I then pulled the main wig into a medium ponytail,(leaving some hair loose to cover the item I was going to add) which I stubbed. I then added the styofoam "party hat" to the stub, pulled the hair I left loose, around that, sewed on some wefts "upside-down" to cover and exposed parts of wig, and then ran a wire thru the "party hat" which had been sewed to anchor some purple craft foam, which I then wrapped the hair from the "party hat" around using hair spray and heat. For the widow's peak, I sewed some felt to the scalp, which I then covered with long fiber sheets that went back to the stub, which covered the rest of the exposed stub. I attached the fiber sheets with tacky glue and silicon. After this, I added the ear flaps from the other wig to this one, and put ringlets in with heat and a dowel rod. A TON of work went into this wig, and it weighed like, 5 pounds, but it was pretty awesome. ^_^
Add a Comment


-
 322105 Visitors
 -
- Cosplayer Info
- Costumes Worn
- Costumes Made
- Props
- Wigs
- Favorites
- Videos
- Convention History


Sorry, you must be a registered user of and logged in to view and add comments. Either log in or register now!