

ACParadise Network:
American Cosplay Paradise
American Cosplay Experience
American Cosplay Snapshots
Cosplayer Nightlotus > Costume of Lilith (Borderlands)
- Most Recent Photo
- 04-27-2011
- Series
- Borderlands
- Character
- Lilith
- Year Completed:
- N/A
- Construction Difficulty:
- N/A
- Costume worn at:
- Kumoricon 2011
- Penny Arcade Expo (PAX West) 2011
- Sakura-con 2011
About this Costume
- Construction Details:
-
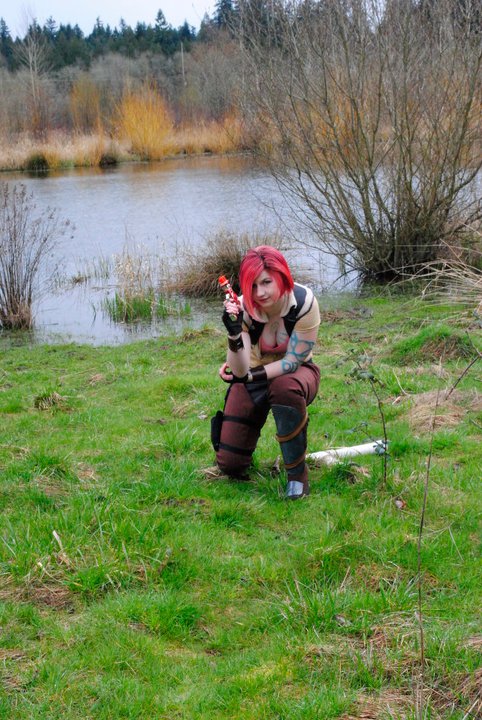
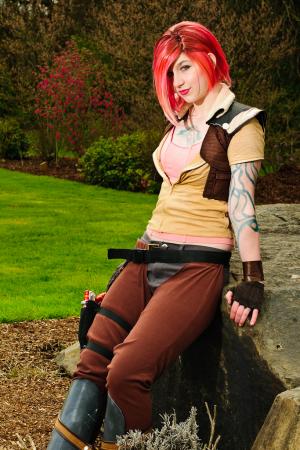
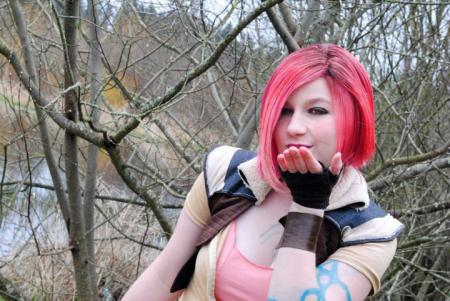
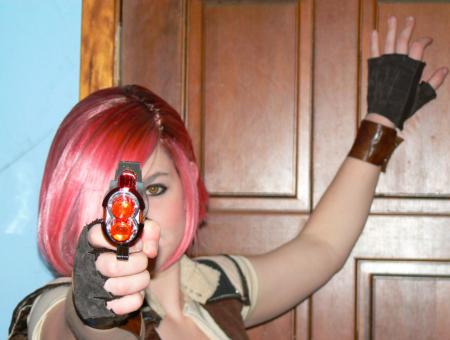
SORRY THIS IS SO LONG! The tanktop for this costume was a sleepwear tanktop from Fred Meyer that was on sale. I got it a little big and sewed in the seams down the front. After looking at it for a while I decided it was a little light colored, so I got some Fuchsia RIT dye and put only about 2 teaspoons in a large pot of water and dyed it for 15 minutes. It darkened it just a few shades and I think it's more accurate now! After hours of searching over many days and stores I found the right tan sweatshirt at Goodwill of all places! I made it short sleeved, sewed it to be tight (but it will need to go tighter when I shed a few inches ^^) and sewed the pockets shut because they were baggy (A problem with used clothing). I feel that it might be a little long (like my tanktop) so I might hem up both a little to expose a touch of belly! I also noticed that the shade of tan was a bit light and really doesn't look good on me so I bought some tan RIT and did about half a pack in a pot of boiling water. The sweater dyed to the right shade almost instantly! The wig started out as something I bought on the coscom marketplace. It had a center part, so I used loose extensions and moved it into a side part. Being my first time using this method it didn't turn out perfectly... but it was a learning experience. This was intended to be a practice wig because I didn't like the look of the extensions I had added, but the dye job relaxed them enough for it to be salvageable. Hopefully it looks ok! I've styled it with hairspray and hair wax and I hope the style will hold for the cons I want to take it to! I got all the fabric for the vest during the Joanns Presidents day sale, and finished it in a single day while I was snowed in! It's fully lined with a quilted nylon cloth and is actually really comfy! I used stick-on neoprene grip pads from an auto shop to do the shoulder pieces. I need to get a few more to finish up the back. I have them now and just need to trim and stick them. I made the chaps out of a thin faux suede cloth by using a pair of my old jeans as a pattern. I cut them up in the right shape while on my body, and used them to trace onto the suede. I salvaged the gray pants from my TF2 Scout cosplay, removed the butt pockets and hemmed them up about 5 inches. The boots were ordered off ebay and are a dark brown suede wedge heel boots. I ordered them 1.5 sizes up so that they could fit my legs + two pairs of pants and socks under, but I'm going to have to use thin socks for them to be comfy! I used my old soccer shin guards as the base, after cutting off the foot portion and removing the straps. Then i heatformed a single layer of fun foam over them and painted them with a glue/water priming coat before gluing them to the modified shin guards. They were then spray painted and spray lacquered to keep them stiff. The white smudges and stains were acrylic paint that I made very watery and brushed over the first layer of lacquer. Right before the white paint dried I took a dry cloth and wiped as much as I could off, leaving the semi-transparent white stains that can be seen in some of the source photos. The straps wrapping around the shins are made from a base upholstery faux leather with a thin strip of tan real leather sewn down the middle. I have the nylon strapping and plastic buckles and have worked up the belts and leg straps, and used cotton backed with the same nylon from the vest for the holster. I'm using a small toy gun I found in a toy store in LA for her gun. Since it was red and silver I thought it would make a good generic RAHL pistol, and I've repainted a few parts to match the color scheme. I'm hoping to have this for PAX Prime 2011, Kumoricon 2011, and if I can make it, Sakuracon 2011!
Wig Details
- Wig Brand
- Unknown
- Wig Name
- Medium Straight without Bangs
- Original Color:
- Light Pink (almost white)
- Styling Time
- 5 hours
- How was the wig colored?
- Mix of Calli Ink and Hand sharpie dye
- Styling Notes
- I went to Art Media and checked out both FW ink (about $6 a bottle) and Calli ink (about $4 a bottle) and found that the ingredients were exactly the same. I bought red, brown and black Calli ink and used it to dye this wig. It worked wonders! After the Calli dye job was done I wanted to have more overlap in the gradient, so I went in with pink, red, and brown sharpies to break up the smooth transition and add a more jagged blend. I think it turned out pretty well for a practice-turned-usable wig, although it would be better if I bought a new one and started from there!
Add a Comment


 Upgrade Cosplayer
Sorry, you must be a registered user of and logged in to view and add comments. Either log in or register now!