

ACParadise Network:
American Cosplay Paradise
American Cosplay Experience
American Cosplay Snapshots
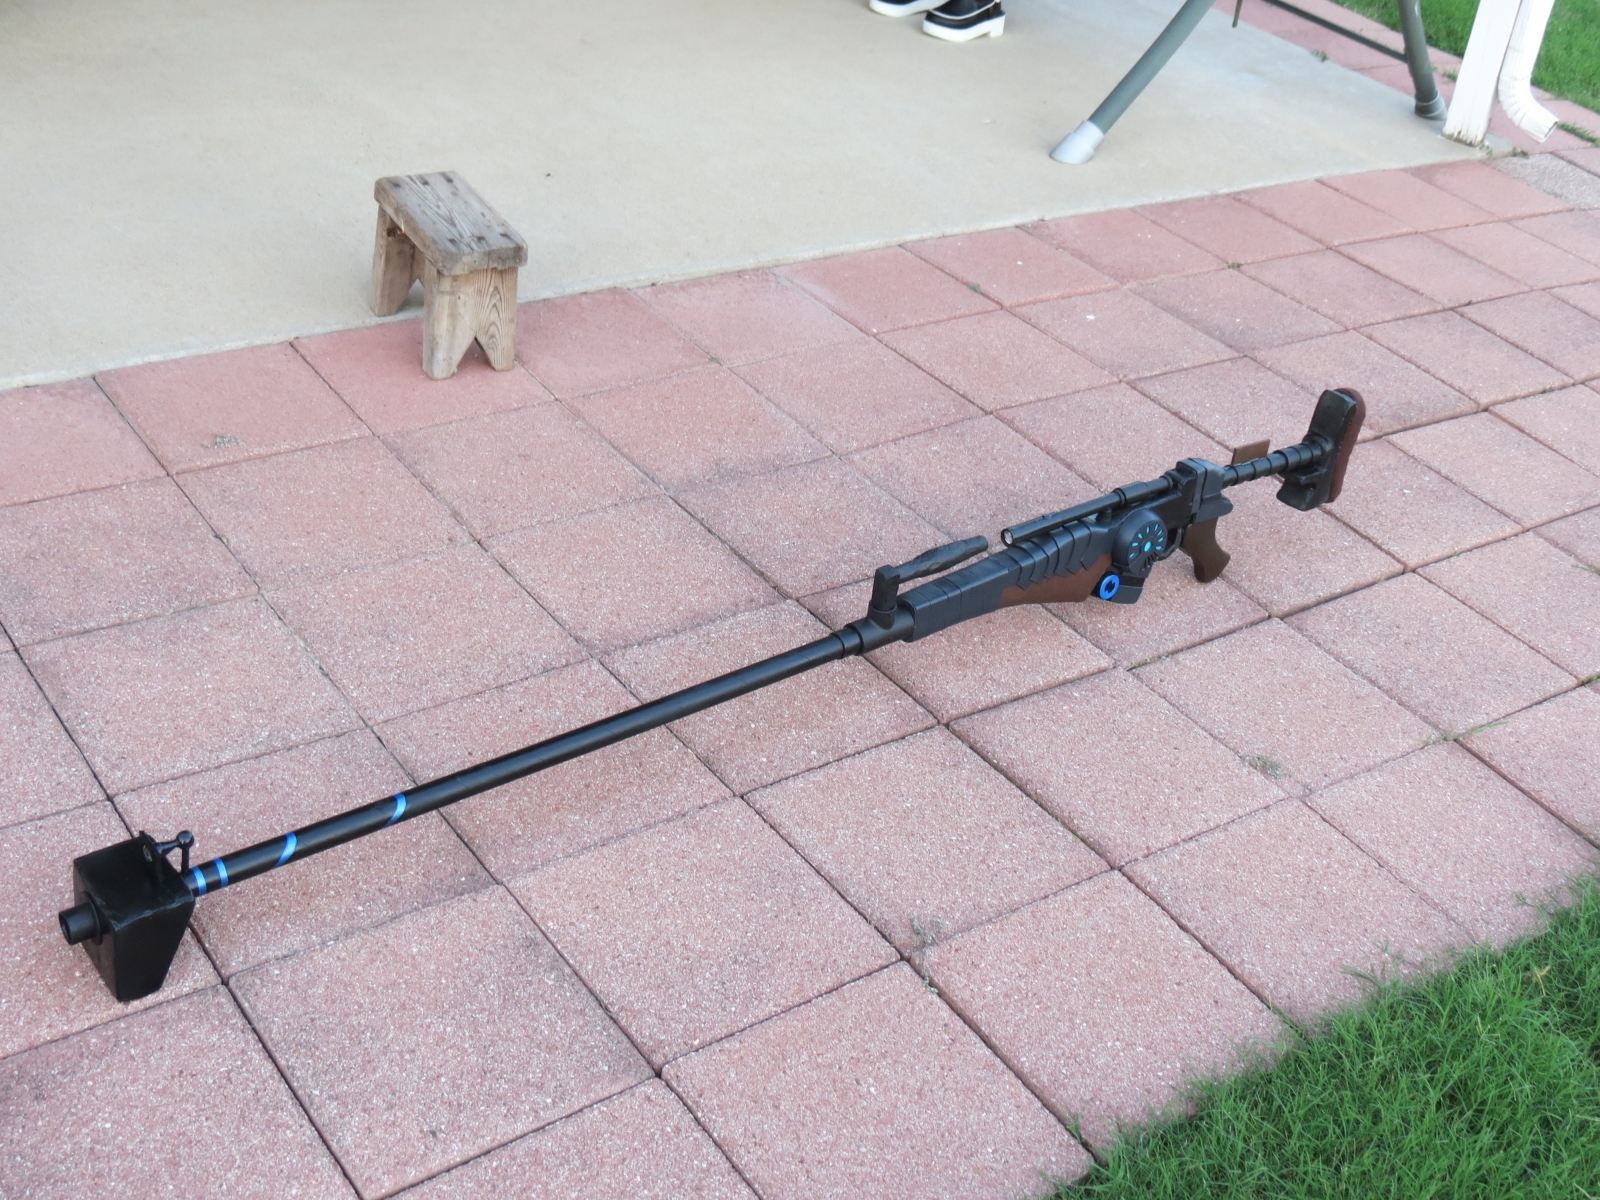
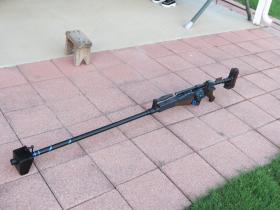
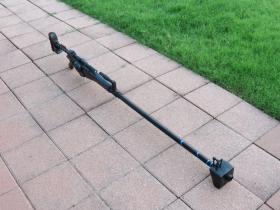
Cosplayer JieKi > Prop of Chaika Trabant (Hitsugi no Chaika)
- Most Recent Photo
- 07-04-2014
- Series
- Hitsugi no Chaika
- Character
- Chaika Trabant
- Item Name
- Gundo
- Year Completed:
- 2014
- Construction Difficulty:
- Difficult
- Awards
- TnT 2014 - Rising Star Intermediate
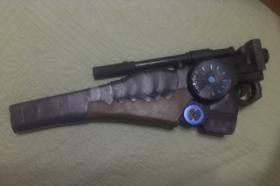
About this Prop
- Construction Details:
-
Materials: Insulation foam, foam board, craft foam, painter's rod, roller handle, pvc pipe, pvc pipe connector, milk caps, newspaper
Tools: Liquid Nails, spray paint, acrylic, modge podge, hot glue, nails
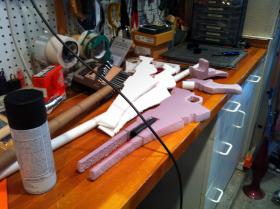
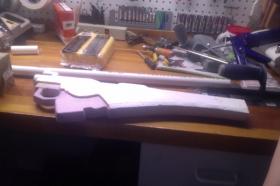
Day 1:First, I took reference photos and made it so that they were proportional in real time. For instance, the barrel is the size of my head to my thigh, the body is about head to stomach, shoulder/handle piece is about a head. I then traced over my screen onto paper (then transferred to construction paper for strength). I made three different sections: body, handle, and shoulder pieces. I made sure they fit together properly before drawing them onto the insulation foam and sawing them out. After sawing out the pieces, I also sawed out a huge chunk for the paint roller handle and rod pieces inside the body. I glued the handle into the body of the gun and added a layer of foam board for support (and the roller was a bit wider than the foam). There is also a layer of felt inside for... rubbing reasons. I also cut out a chunk for the back shoulder piece and glued a pvc connector in there. The foam board also covers that area for support.
Day 2:
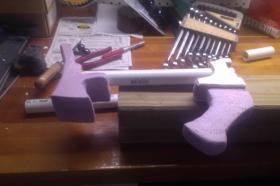
My dad helped me saw the painter's rod shorter and glued/nailed in a cardboard tube (long piece that originally held canvas paper). We took it out of the body and spray painted it. I carved a chuck of the shoulder piece out in order to glue the pvc pipe into it. I took the pvc pipe and put in in the connector of the body and glued on the handle pieces. In order to prevent any accidental sticking, I took the handle piece out and lay it to dry separately.
Day 3:
Not much done today... I covered the foam with spackle and sanded that and then with modge podge and water to seal it. I cut out my scope and pieces. I glued on a magnet where the handle piece goes for better stability. The PVC connector wiggled outta place when I put it all together, so I'll probably hot glue it just in case... Ugh lol
Day 4:
I hot glued that pipe sucker. It wont be going anywhere now (I hope...). I sanded down some edges to make the pipe fit better... but other then that I spray painted the whole thing black. In the long run, I don't think it'll do much since it will all be covered in craft foam, but just in case pieces peep out, i have the base black... Anyway I then painted the body base brown with acrylic, and cut out all the pieces from the paper template I made and transferred them onto craft foam! I did a modge podge water seal and painted all the pieces with black paint. The "domes" were painted with a layer of teal, then light blue, then blue metallic blended together. Craft foam was glued over it to create the weird "vent" look.
Day 5:
Alot of detailing craft foam was put over everything... I think I actually finished putting all the raised pieces up today! And most of it is already colored and stuff... The pvc is a bit looser but I'm still paranoid that I'll yank something off next time... sigh. Anyway i patterned most of the stuff with paper first (just in case) and glued all those pieces on. Some pieces are glue/watered sealed, but some aren't because I felt it was unnecessary (such as tiny small details). The trigger was put in with 3 layers of craft foam. Tomorrow, I will work on the barrel and shoulder cushion thing~!
Day 6:
Everything in the base and shoulder piece is practically done. I decided to modge podge most of the craft foam and so now it's glossy-ish, which is kinda weird because I used the matte version... OH WELL! Anyway for the weird barrel piece I took 4 layers of insulation foam and glued them all together, and covered it with paper-mache. I sanded it a little after it dried and painted the whole thing. The weird tiny pieces on top are cardboard, craft foam, and clay. At the front I decided to put an acrylic gem to pretend it's the glass piece.
Day IDK I SKIPPED:
I glued on the tiny scope piece to the barrel and decided to actually make my scope piece. The scope is a dowel rod cut into two pieces: a long piece and a short piece. I glued a magnet on the end of both pieces. The short piece was then glued into a pvc pipe and embellished with craft foam. I glued the pvc pipe to the top of the base of the gun. I glued another gem to the other end of the long dowel rode, and also fixed that up with some craft foam. This way, the scope can (technically) snap on and off the body of the barrel. After fitting the scope, I glued another two magnets to the front dowel to better support it. I'm actually pretty impressed with the magnets. They are REALLY strong for crappy magnets lol.
Day FINAL:
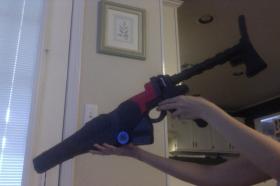
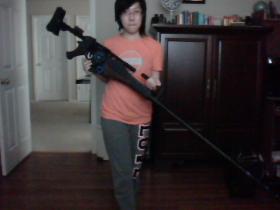
I completely finished! The short handle piece is made from a dowel rode with duct tape and paper-mache to create a bump. It was screwed into a scrop piece of wood and then screwed into a tee pvc pip connector. I glued felt inside the pvc pipe to a better fit. The connector slips on over the barrel. I glued another craft foam band around the base so that it stays in place. I forgot a weird brown piece on the shoulder thing so I made it the same way I made the front scope and just glued that on. IT'S TOTALLY DONE AND GIANT NOW. - Personal Thoughts:
- Hecks yeah first time making a prop this size with this many materials... wow... FUN TIMES!! Special thanks to my papa~!
I swear I'm going to walking around the con floor paranoid that I'm going to hit someone or something's going to hit me and EVERYTHING WILL GO WRONG.
Add a Comment
-
 370879 VisitorsAcy's Pick: 05/2018
 -
- Cosplayer Info
- Costumes Worn
- Costumes Made
- Props
- Wigs
- Favorites
- Convention History


Sorry, you must be a registered user of and logged in to view and add comments. Either log in or register now!