

ACParadise Network:
American Cosplay Paradise
American Cosplay Experience
American Cosplay Snapshots
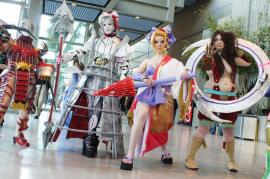
Cosplayer Purgatorian > Costume of Tira (Soul Calibur 4)
- Most Recent Photo
- 01-11-2013
- Series
- Soul Calibur 4
- Character
- Tira
- Year Completed:
- 2012
- Construction Difficulty:
- Difficult
- Awards
- Best Novice at Sakuracon 2012 with Ellipsis Cosplay
- Costume worn at:
- Sakura-con 2012
This Costume has been retired
About this Costume
- Construction Details:
-
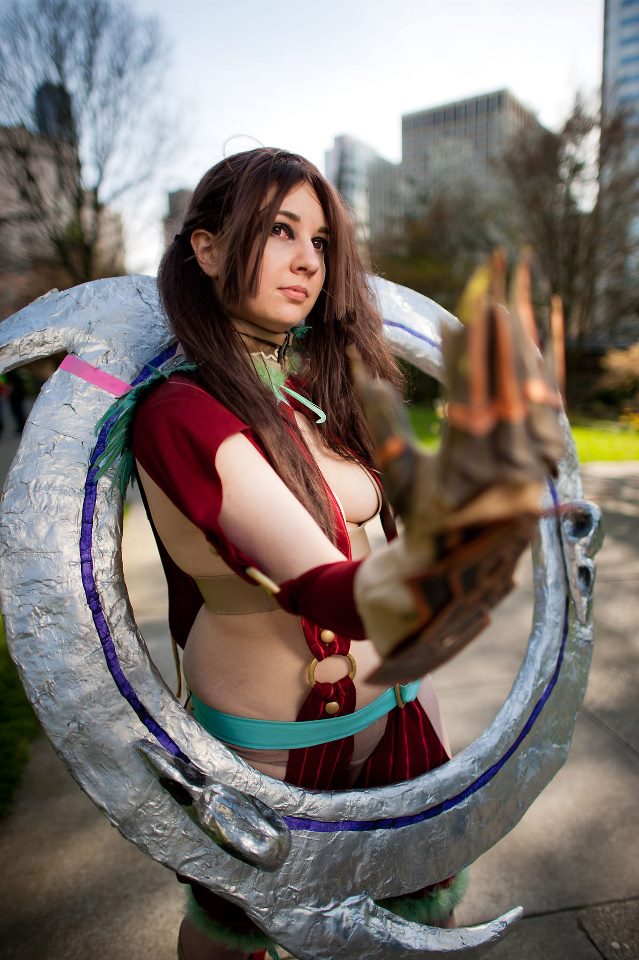
The red... romper thing?: I don't even know what to call it, but I basically took a pants pattern and drew out a shirt pattern, made a mock up, stuck them on my dressform and drew out where I needed to cut out all the holes and such. It was an... interesting process. After I was happy with the mock up, I used a red knit to create the real thing. The stripes were painted on using fabric paint. The gold rings are Apoxie sculpt painted gold and the button/snap things are metal button covers from a kit that I also painted gold. The feathers attached to the short cuffs are duck feathers and feather trim that I dyed using Rit Dye.
Collar/back armor: I made this out of craft foam. All the details are painted on and the major ones are made out of vinyl. It snaps in the front which was probably the worst idea ever and I have no idea why I didn't put the snaps in the side, but anyways... the feathers and feather trim were glued onto the back and I kind of wish I went a bit crazier with the feathers, but oh well.
Boob straps: I honestly don't even know what else to call these but since these are essentially straps that cover my boobs, I will refer to them as boob straps. These were made out of a tan vinyl and it works like a halter top and snaps in the back. It's horribly inaccurate but I made this the night before.
Gloves: LET ME TELL YOU ABOUT HOW MUCH I DESPISE MAKING GLOVES. NEVER AGAIN. Okay that's a lie, I'll probably end up making them again. For my past cosplays, I've been able to get away with just buying and dying gloves. But this time, I couldn't because Tira's gloves not only look like leather (I used a faux suede though because I'm cheap), but the're loose fitting at the wrist and you can't really achieve that with costume gloves. I've never made them before and didn't know what I was doing and probably made them wrong, but I basically traced my hand. I think I made 854348734 gloves before I finally made one that actually fit right. For the thumb, I used a pattern I found on Google. The armor pieces were made from craft foam which is something I'll never do again because the paint started chipping on the finger pieces after only a few hours.
Belt: The belt was made from canvas that I folded over a bajillion times. The heart piece on the back of the belt was made out of Model Magic and craft foam for the raised parts, then paper mache'd and then I put a bit of Paper Clay on the rough areas to smooth it out. The buttons on the back are more metal button covers from a kit that I spraypainted and then glued on.
Boots: I took a pair of boots that I didn't wear anymore, destroyed them and made bootcovers out of the same faux suede I used for the gloves.
Weapon: My ringblade, who I have nicknamed Irene, started out as a hula hoop sandwiched between two layers of poster board. I then used Model Magic on the inner ring to create the vertebrae-like structures (I don't know what else to call them and that's what they remind me of) but they ended up getting lost in the many layers of paper mache sadly. The three blades that come off the main blade are also poster board that I stuffed with newspaper so they wouldn't loose their shape. After I covered the entire ring blade in duct tape (paper mache is wet and that + posterboard = major warping... I found this out the hard way) and started paper mache-ing. My friend Mandy helped me out a lot with the paper mache-ing and another friend helped with sanding while I did last minute costume stuff. After the sanding, the bird skulls (who I have also nicknamed) that I made from Model Magic were hot glued on and everything was spraypainted. - Personal Thoughts:
- This costume was created to enter a costume contest with my group, Ellipsis Cosplay. I also really like Soul Calibur and have always wanted to cosplay Tira so this was finally an excuse to do it.
I'm not 100% happy with the costume and there's some things I wish I did differently, but I guess there's nothing I can do about it now.
Wig Details
- Wig Brand
- Arda Wigs
- Wig Name
- Jareth Long
- Original Color:
- Dark brown
- Styling Time
- ~6 hours
- Wig Quality Rating
- 5 / 5.00
- Styling Notes
- Because there was no center part (there was an even number of vertical weft... thingys... I don't know what to call them), I had to create one using a pack of extensions I bought and sewed them into the wig. It was a huge pain in the butt, but I needed to create pigtails. The pigtails were not stubbed or clips ons, they were just pulled into hair ties. One of the pigtails was intentionally placed higher on the head and ratted up a bit for accuracy. The bangs were pretty easy and self explanatory and so was the braid in the back of the head.
- Wig Review
- As always, Arda's wigs never fail to disappoint me. Their wigs are fairly thick (compared other wigs) and easy to style.
Add a Comment

-
 37850 Visitors
 -
- Cosplayer Info
- Costumes Worn
- Costumes Made
- Props
- Wigs
- Favorites
- Videos
- Convention History


Sorry, you must be a registered user of and logged in to view and add comments. Either log in or register now!