

ACParadise Network:
American Cosplay Paradise
American Cosplay Experience
American Cosplay Snapshots
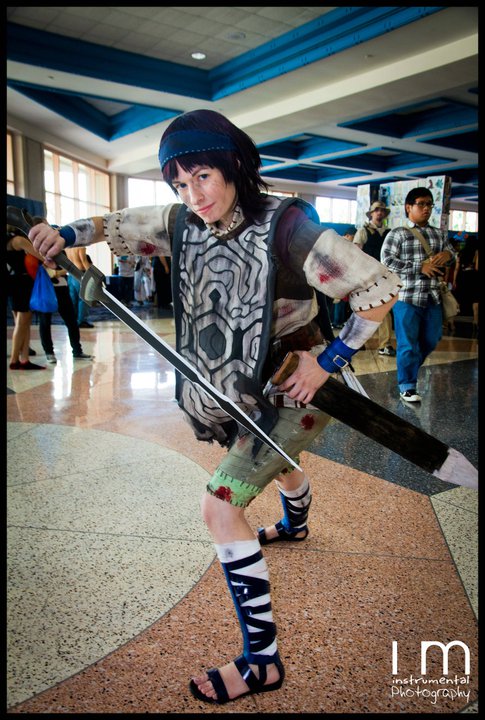
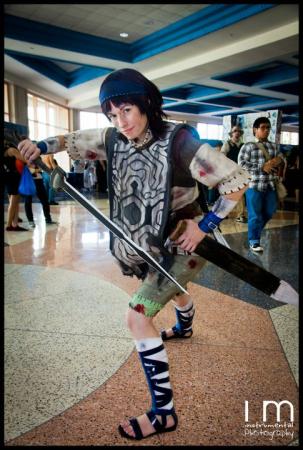
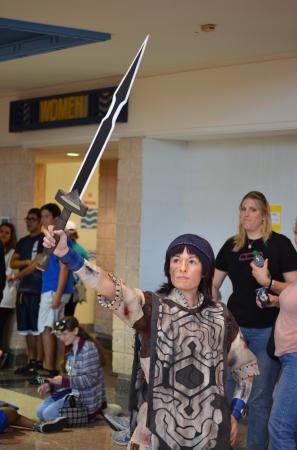
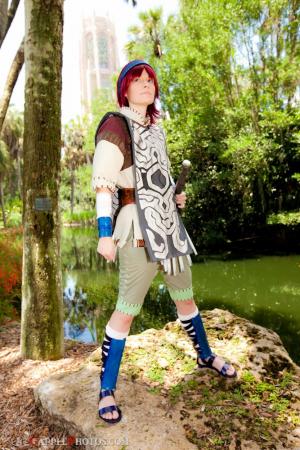
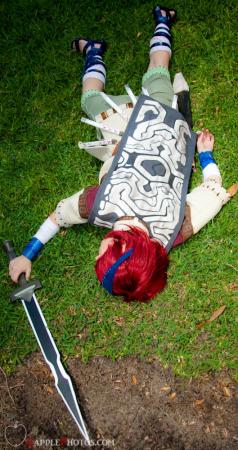
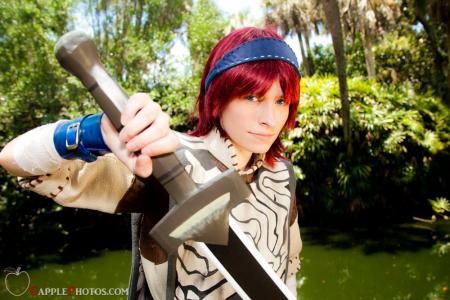
Cosplayer MakeshiftWings > Costume of Wander (Shadow of the Colossus)
- Most Recent Photo
- 06-27-2011
- Series
- Shadow of the Colossus
- Character
- Wander
- Special Variation:
- Clean/15th-16th Colossus Dirty State/Possessed
- Year Completed:
- N/A
- Construction Difficulty:
- N/A
- Awards
- Best Master Craftsmanship - Metrocon 2011; Mascot's Choice (Monsters vs. Hunters) - Metrocon 2011
- Costume worn at:
- Anime Festival Orlando / AFO 2011
- Metrocon 2011
About this Costume
- Construction Details:
-
I love Shadow of the Colossus so much. It's my favorite video game. I've wanted to do Wander since the time I finished Pit (my first cosplay), but decided to push it back til I had more experience with sewing and prop making. I finally got the courage to do it, and now... it is time! This outfit is insanely detailed. I had an extremely difficult time finding good references that showed off every detail of his outfit, so I hit the internets. I stumbled upon a program that lets you view any model from Shadow of the Colossus. I was so happy because I got perfect references this way. I really couldn't tell what was going on with Wander's tunic since his tabard always covered it, but with this, I got to see all the details and weird stitchings. Unfortunately I couldn't find the tabard in the thousands upon thousands of files in this editor, but screenshots and the game itself were enough to pattern it out. Texture was really important in picking fabrics for this costume. The game itself has a great look and feel to it, and I really wanted to bring that into the outfit. The pants were made from a twill with a rough looking texture and a linen. I edited a pattern to make the pants tight and to add the cuffs onto the bottoms. There's hand stitching all around the cuffs, waistband (even though it'll never be seen... but that's how his model is), and all the seams (even the crotch!). I picked a little wooden toggle looking thing for the button, since that was one thing you couldn't see in the editor since his tunic always covered it. The tunic was... scary, to say in the least. I was not looking forward to starting it, but turns out I was making it more complicated than it needed to be. It took me FOREVER to find a good fabric for the cream part of the tunic, because it looked like carpet, but I didn't want to use actual carpet for it, of course. I ended up finding the most unbelievably perfect fabric for it, both texture wise and color wise. I chose a suede for the maroon parts, which the model also had that kind of texture. I happened upon an awesome fabric at Joann's for some of the brown details, which was basically fabric painted to look like leather, which the details look like. The smaller details are made from a linen. The shapes on his tunic are very odd (especially the random squares and triangles on the front and back), but they're accurate. His model actually is invisible underneath his collar and between those squares and triangles, so I made the decision to stick with the maroon suede, because I liked the fabric. Anyway, it's an altered pattern again (although surprisingly, not too altered). The top was basically split in half horizontally in the front and back to make the transition from the suede to the "carpet" fabric, with the brown details appliqued on top of it to hide the transition. I decided to paint on the little symbols he has on his brown details, since I'm already using a ton of applique in this costume and wanted a little more variety in techniques. Like the pants, this has a ton of hand-stitching, including some on all the seams of the cream fabric, along the bottom, and on the collar. The tabard was an insane amount of work. It's got 4 sides, and luckily, the symbols are the same, except mirrored. The base of the tabard is a dark gray hemp cotton fabric. The symbols are off-white linen, and were heat n bonded on (probably around 120 symbols total). After that I satin-stitched around around each symbol. That itself was around 6 hours of work, and EXTREMELY tedious. Afterwards, I dirtied it up with some black make-up powder. I'm super happy with the tabard! It's the piece that really pulls the outfit together. The belt was very fun to make, as leather is quickly becoming a new favorite of mine. It's two pieces of leather glued together. The symbols are beveled on, with the larger symbols being completely stamped in. It was dyed with an eco-flo dye, and I absolutely love the color. The fringe (the dangles) is made from wooden moulding glued together. The top and bottoms were shaped with Paperclay. I had to alter the shape of the top of the fringe a bit, because it's extremely thin in the game and probably would have broken off at some point if I made it that thin. They weren't primed because they have a wooden-like texture in the game. They're painted with acrylics, and weathered a bit with the same dark gray paint used at the faded bottom. They also weren't finished because I'd like them to further weather on their own, and I didn't want them to have a glossy look afterwards. The fringe is tied on with white hemp string. The belt closes with two snaps on the inside. The best part is that I jingle when I walk! The bracelets were definitely the easiest part, and only took me a couple hours. I drafted my own pattern for them. They close with small buckles on the sides and were also dyed with eco-flo dye. That's about it! The bandages are made from gauze fabric and dyed with coffee so they aren't so stark white. The sandals seemed like they were going to be very difficult, but ended up not being so bad. I bought a pair of sandals with a thong in the front and a back piece. They were VERY blinged out: http://i301.photobucket.com/albums/nn52/makeshiftwings30/fb448ee4.jpg The decorations and extra straps were promptly removed, along with the back piece being shaped some more with a utility knife. Thicker straps were cut out of leather and glued to the sandal. The shin guard is also leather. The two large pieces were wet-formed to the shape of my shin. Each strap is glued onto one side of the guards then snaps onto the other side of the guard. The shin guards connect to the sandals with one strap that connects to the back piece of the sandal. The lighter blue parts were dyed and then dulled with black antiquing gel, while the darker parts were painted with Angelus leather paints. The shin guards were then weathered with sandpaper, a little bit of white paint, and then bashed against the cement with a hammer. I'm happy with the way they turned out but they're EXTREMELY uncomfortable. The sword is made from red oak. The main shape, including the hilt, was cut out. The cross guard was built up additionally with a couple more pieces of wood sandwiched onto the main piece. The entire hilt was detailed with paperclay, including a little bit more definition to the cross guard and making the pommel. The edges of the sword and the ends of the cross guard were beveled down to an edge. The whole thing was primed in gesso and primer spray, then painted with spray paint and acrylics. The scabbard is made out of leather also. It's two pieces with really thin, long pieces glued along the edges so it has some dimension. The paint job was a bit tricky to figure out as his scabbard has a really weird texture. I started by painting the pieces with a tan leather paint. Then, I used black antiquing gel on a paper towel to run the gel along the length of it. It covered most of the tan save for some long streaks, which is the texture that I was going for. The white part at the bottom was latex-based acrylic paint with more antiquing gel to dirty it up. The top, brown part was wet formed into shape then dyed with some simple leather dye and glued on. The scabbard attaches to the belt with a little loop that's glued and riveted onto the back part of the scabbard. The loop simply goes on the belt before I snap it shut and stays nicely in place! After I made it all, I decided to get some pictures of it clean before dirtying it up. The weathering process was heartbreaking, but I'm really happy with how it turned out. The clothes were weathered with black charcoal powder, brown charcoal stick, and fake blood. The tabard was weathered with the same items, but also ripped at the bottom and sides with a utility knife and rubbed with sand paper. The bracelets and shin guards were also scuffed up with sandpaper, and the belt was given a layer of black antiquing gel. Next was the horns - these were originally sculpted out of clay, then a mold was made of them so that they could be cast in liquid latex. I wanted them to stay lightweight so they wouldn't weigh the wig down. They were glued onto a couple of barrettes so I can take them off to be non-possessed Wander if I want. They were painted with acrylics.
Wig Details
- Wig Brand
- Cosworx / Cosplay.com
- Wig Name
- Scruffy L
- Original Color:
- Burgundy
- Styling Time
- About 1.5 hours
- How was the wig colored?
- RIT Dye/Acrylics/Sharpie
- Styling Notes
- Cut the bangs into the wig and trimmed the length a bit. Dyed darker for dirty/possessed Wander.
Add a Comment


 Upgrade Cosplayer
Sorry, you must be a registered user of and logged in to view and add comments. Either log in or register now!