

ACParadise Network:
American Cosplay Paradise
American Cosplay Experience
American Cosplay Snapshots
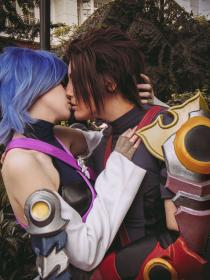
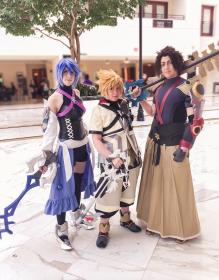
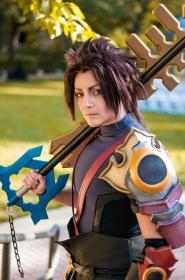
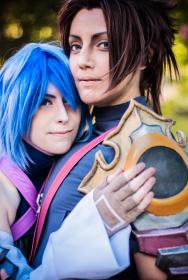
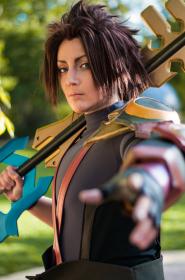
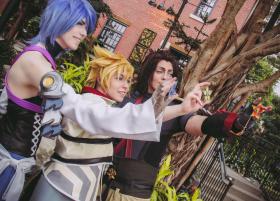
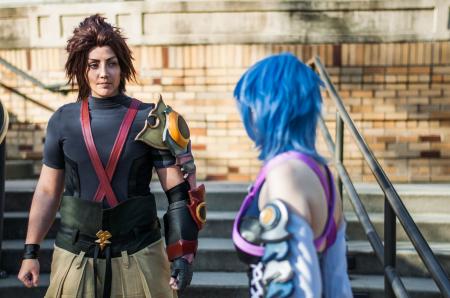
Cosplayer VintageAerith > Costume of Terra (Kingdom Hearts Birth by Sleep)
- Most Recent Photo
- 03-26-2021
- Series
- Kingdom Hearts Birth by Sleep
- Character
- Terra
- Year Completed:
- 2016
- Construction Difficulty:
- Very Difficult
- Prop made by
- CeruleanDraco
- Awards
- Judges Award, Hall Craftsmanship, AnimeUSA 2016
- Costume worn at:
- Anime USA 2016
- MAGfest 2016
- Otakon 2016

About this Costume
- Construction Details:
-
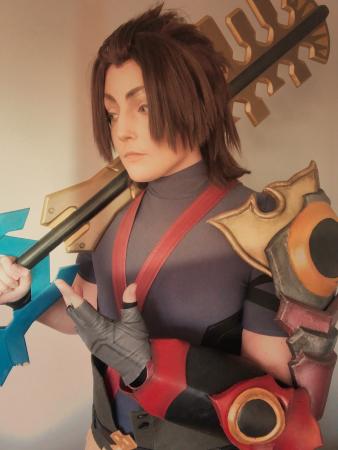
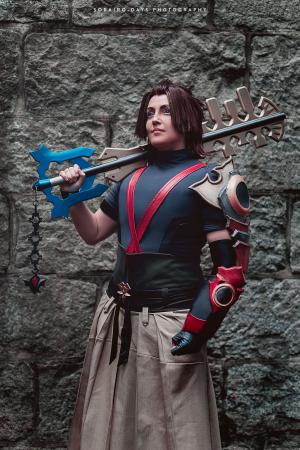
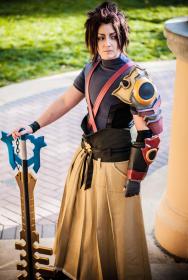
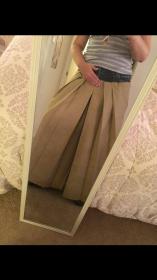
PANTS:
I did two muslin re-dos before cutting into my denim, and had to do some weird ordering from front-to-back in order to account for the pleats coming up to the waistline on the front and only up to a yolk seam on the back. I individually topstitched every single pleat (outside and inside) to help keep its shape. I added functioning pockets and denim decoration, then created the grey waistband piece. Once attached, I made and sewed on belt loops.
STRAPS:
I cut two-inch wide vinyl that I folded on each side to be one inch, then topstitched with a Teflon foot. The straps hold the pants up from the inside seam where the tan fabric meets the grey fabric.
SHIRT:
I based the shirt pattern off a muscle enhancer shirt I already own, except I drafted a turtleneck directly into the pattern (all one piece). I cut it out of doubled-up jersey knit and ordered it carefully so there would be no hems or raw edges on the sleeves or collar. For the vented sides, I created the illusion of an undershirt by hand-drafting bias tape that would only be tacked down around one edge, and left free on the inner edge to move freely. The bias tape was drafted by drawing the diamond shape on doubled-over stretch vinyl, sewing along the inside to create a seamless circle, then pressing and topstitching to create a solid, free-standing pleather tape to go around the edge of the faux vent in the side of the shirt. The black fabric underneath is just plain milliskin sandwiched under the bias tape.
The shirt also includes a pair of shorts with crotch snaps to keep it from riding up.
OTHER VARIOUS ACCESSORIES:
The black wristband is made of the same stretch vinyl that is used on my arm gauntlet, the shirt vents, and the belt. The belt does not actually hold up the pants, so as not to cinch the waistband in too far and create wrinkles, it's only there for decoration. I originally attempted to sew a glove, but upon realizing that neither a woven or a spandex really suited it and the unavailability of the right color of leather, I ordered a leather glove in the right color and sewed the piping in at the end.
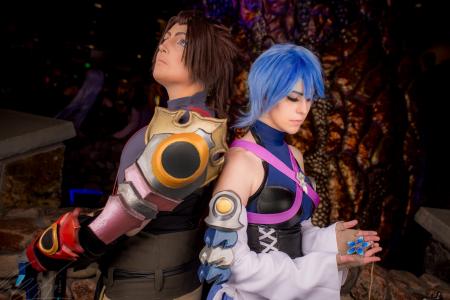
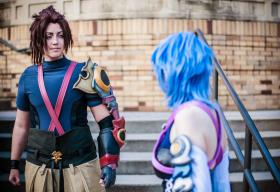
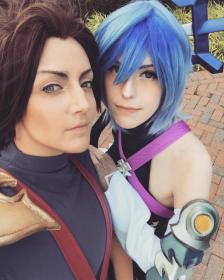
The Land of Departure belt buckle was commissioned as a 3D-printed piece from Silverbeam on Etsy, and painted and aged by me (it matches Aqua and Ven's).
The Wayfinder was also purchased from Silverbeam, and matches Aqua's and Ven's.
Ends of the Earth (Terra's final Keyblade) was commissioned from CeruleanDraco, custom-sized to be proportional to my height once wearing my heel lifts.
SHOES:
I bought leather men's slip-on shoes that were 3 sizes too large (so that I could fit my feet inside along with 3+ inches of heel lifts). I sprayed them with leather shoe paint and made accents with gold vinyl.
ARMOR:
I hand-patterned the armor onto EVA foam mats, including the gauntlet, which was a really weird challenge since it is large and bulbous at the top and smoothly tapers down to the wrist. I used brown Worbla to cover all necessary pieces, and used the worbla over a cereal bowl and a small espresso saucer for the rounded button shapes. I used the contact-cement stretch vinyl method to cover the gauntlet, which ended up working surprisingly well, I was really excited! I will definitely need to use this method again in the future. I spray-painted all necessary pieces and then spent a long time hand-painting the more difficult or small-surface-area colors. I attached pieces to each other with wads and strips of heated-up Worbla, and used the same method to mount them onto straps to anchor the top piece to my shoulder (the gauntlet stays on without any support).
WIG:
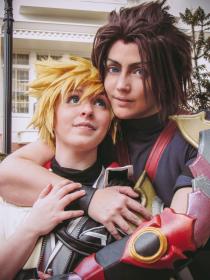
I started with a dark brown Marty (a lacefront widow's peak wig) from Arda, and first pulled down the sides to create as much of an illusion of side-curtain bangs as possible. Then, I spent several hours sewing wefts in, upside down to create some volume at the top where they are attached, to create his bangs. Then, I handed the wig off to my Ven to weft and style the back. - Personal Thoughts:
- my son, don't look at me, i'll just start crying
Wig Details
- Styling Notes
- Heavily wefted and styled
Add a Comment

-
 1490955 Visitors
 -
- Cosplayer Info
- Costumes Worn
- Costumes Made
- Props
- Wigs
- Favorites
- Videos
- Convention History


Sorry, you must be a registered user of and logged in to view and add comments. Either log in or register now!