

ACParadise Network:
American Cosplay Paradise
American Cosplay Experience
American Cosplay Snapshots
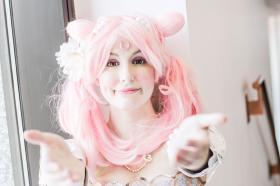
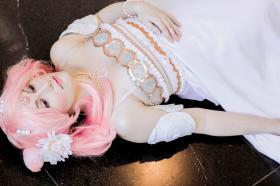
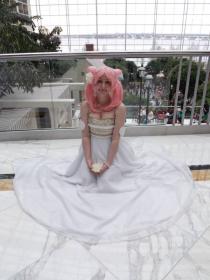
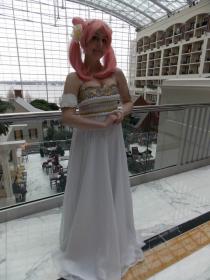
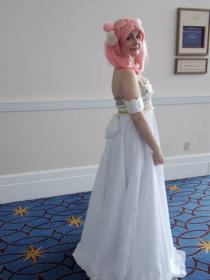
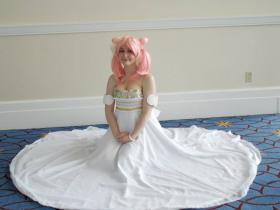
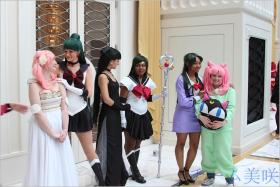
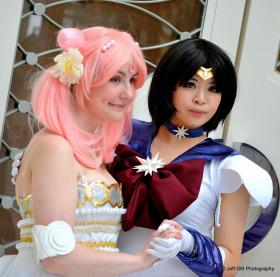
Cosplayer Fancy_Duckie > Costume of Chibiusa / Rini (Sailor Moon)
- Most Recent Photo
- 10-12-2016
- Series
- Sailor Moon
- Character
- Chibiusa / Rini
- Special Variation:
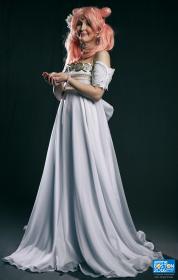
- White Princess Gown (Manga)
- Year Completed:
- 2014
- Construction Difficulty:
- Difficult
- Costume worn at:
- Anime Boston 2016
- Katsucon 2015

About this Costume
- Construction Details:
-
OK SO!
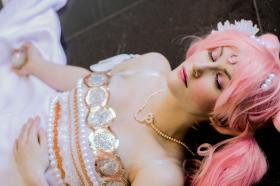
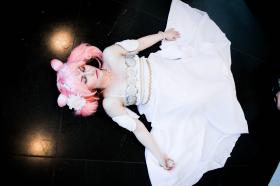
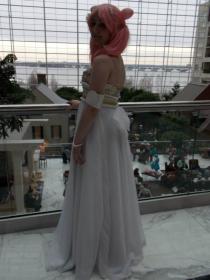
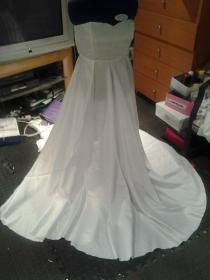
BASE DRESS: is white casa satin; it's lined with some cheap-o fabric I had lying around from when I made my senior prom dress. Woohoo for recycling! I patterned it myself. The skirt is just a super long circle skirt; I didn't add too much to the waist of it for pleats, but I did make it 5 or so inches longer than me in stocking feet since I planned to wear this in 4.5 inch heels (I lasted all of an hour before switching to flats, lol). The overskirt is white casa chiffon, which DOES NOT MATCH the satin (WHY?! You're both white from the same collection: WHY DON'T YOU MATCH?!), and is made in the same way as the lower skirt. The skirts I had to make in two separate half-circles which I then sewed together. There's another seam in the back where the invisible zipper goes. I sewed the two skirts to the bodice at the same time, and then added an invisible zipper. I don't have a serger, so I do my "cheapo serging" by doing a straight stitch to sew whatever I'm trying to sew together (i.e. two pieces of skirt) then going over it with a zig-zag stitch, and then a second straight stitch. Then I trim it and fray check the ever living bejeesus out of it. I made the mistake of not fray checking the hems of the chiffon layer for a while and paid dearly for it; I had to re-hem it in a lot of places and it looks pretty messy. I actually fray checked it in the car on the way to Katsu.
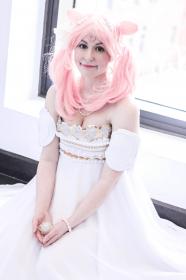
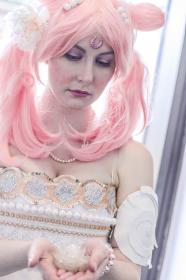
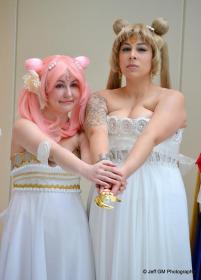
DETAILS: PrettyDeer and I decided we wanted to do manga-version details for these dresses, but with anime colors because we noticed in hall shots a lot of details of other Princess Serenitys get washed out when they're white/silver. Originally, I planned on doing the gold donuts out of embroidery, but that didn't work, so I tried satin stitching gold fabric, but my machine's smallest zigzag was too wide & the foot shredded the fabric. So eventually, I cut the donuts out of the fabric using a razor, fabric glued them to a piece of white casa satin, and then cut off the excess with a razor as well. I needed a way to avoid having the outside edges fray, so I found some gold sequin trim and fabric glued it to the edges of the donuts. I hand sewed this piece to the dress. Then, the arduous process of rhinestone-ing the donut holes began. ; A ; In total, this dress has ~2,000 silver rhinestones on it and 14 hours of labor on rhinestone alone. (Fun story: after Katsu, got this dry cleaned, and asked for them to just clean the skirts, not the bodice; get it back, about 1/4 of the rhinestones are missing, and all of my hand-stitching had to be redone.) I ordered some fake white pearls in bulk and hand strung them onto a stretchy jewelry string, and then hand sewed those to the dress using clear thread. (It's wonderful, but very curly so a pain in the buns to knot off!) I was scared of making the string too taught, so I just made it the length of my bust & waist without stretching it, and then made the string tighter after the pearls were sewn on the dress. (Thank goodness for dress forms!) After that, I left a gap under the top row of pearls for the 3 lines of trim PrettyDeer and I picked out (sewing them flush hid the first one). I had to hand sew the trim with the rhinestones on it because there was no way to do it with the machine, but I machine stitched the other two on there, as well as the "u" shaped trim. Unfortunately, my bust is bigger than donuts + 2 rows of pearls + 4 lines of trim, so the gaps I have on there were pretty large/made my inaccuracy spidey senses tingle, so I added some rose patterned lace trim (because Chibi-Moon is the daughter of Tuxedo Mask, I figured roses would be fitting), and hand-sewed a 2mm pearl to the center of each rose because I clearly like suffering.
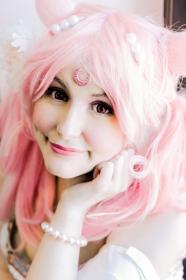
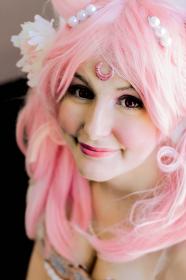
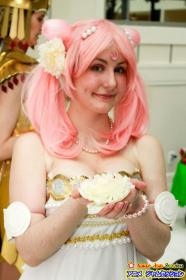
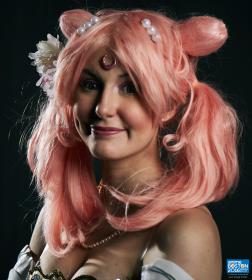
JEWELRY: I wasn't sure what color pearls I should wear with this, so I borrowed some pink and white ones from my mom but pink won over, haha. I bought a pink pearl bracelet from the wonderful Starlightslk the Friday of Katsu because a white one of mine had a broken clasp. I love love love this bracelet so much!! It's so pretty and matches the pearl necklace I borrowed from my mom and the earrings I have perfectly! I made my pink forehead crescent (Chibi-Usa technically has a Pink Moon Crystal, so I figured her crescent should be pink too!) For AB, I had more casting issues, so the gem is actually made out of hotglue and painted with pink nail polish. The older version was resin painted with body paint, lol.
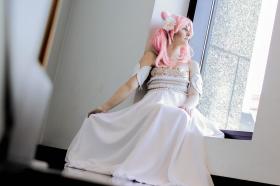
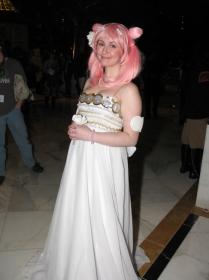
For the first version of the armor/sleeve thingies are literally 3 progressively smaller craft foam circles that are hot glued on top of each other, and then one circle that's the same size of the base is what connects the two pieces on the outside.
For the second version: this didn't turn out the way I wanted it to (should have made the circles /much/ smaller but: I drew the circle on paper to use as a reference, sketched out the snail shell and cut that out (two going one way for the front, and then flipped the other side for the back part of the arm), and then used the side part of the circle as a guide for sketching out the flippy bits - three of those for the edge of the front and back panels of the circle. Then I sketched out the middle parts (four pieces total, mostly straight with the v cutout in two different lengths), cut everything out of the craft foam. I glued the front and back pieces so they were touching each other on top of the middle circle, then did the snail shell for each side so that the "tail" of it faces towards the middle, then glued the flippy bits for one side of the circle down, then the middle parts for the side closest to that circle, and repeated with the other side. The front/back flippy bits should cover some of the middle parts so it took a little bit of finagling to get it. Then I heated everything up on the stovetop and formed each circle over a styrofoam ball to get it to be sticky-outy, fixed any hot glue that came loose, and then painted everything with glitter mod podge. To get it to stay up, I sewed three pieces of clear jewelry elastic (which snapped between judging and my walk-on ofc) between the front & back circles.
For my bun flower, I found a bouquet of fake flowers from Joann's with pink tips, and just cut some of the outer petals off so it wasn't SUPER HUGE OMG FLOWER and just stuck it into my wig.
My old lenses were from Pinky Paradise, and my new ones are from honeycolour. - Personal Thoughts:
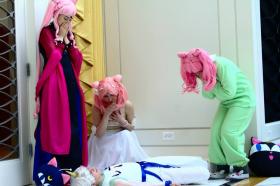
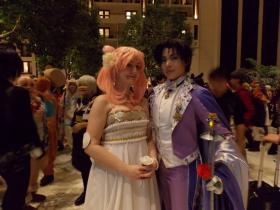
- I'm so excited to finally be making this dress!! I've loved this design since I was a little girl watching Sailor Moon on TV, and I think I'm at the skill level now to do it justice. Eventually I want to make Chibi-Usa's pink princess dress, but I have 40 yards of white casa satin lying around from a group cosplay that never panned out, so that's why I'm making this one first! I'll be making a Princess Serenity dress for my lovely cosplay partner in crime PrettyDeer, too!
Wig Details
- Styling Notes
- See my Eternal Sailor Chibi Moon for details!
Add a Comment
Photos
-
Photo 1
 0
0  318
318 -
Photo 2
 0 307
0 307 -
Photo 3
 0 271
0 271 -
Photo 4
 0 308
0 308 -
Photo 5
 0 322
0 322 -
Photo 6
 0 288
0 288 -
Photo 7
 0 288
0 288 -
Photo 8
 0 288
0 288 -
Photo 9
 0 272
0 272 -
Photo 10
 0 312
0 312 -
Photo 11
 0 284
0 284 -
Photo 12
 0 455
0 455 -
Photo 13
 0 395
0 395 -
Photo 14
 0 395
0 395 -
Photo 15
 0 352
0 352 -
Photo 16
 0 395
0 395 -
Photo 17
 0 385
0 385 -
Photo 18
 0 365
0 365 -
Photo 19
 0 397
0 397 -
Photo 20
 0 384
0 384 -
Photo 21
 0 363
0 363 -
Photo 22
 0 358
0 358 -
Photo 23
 0 392
0 392 -
Photo 24
 0 351
0 351 -
Photo 25
 0 384
0 384 -
Photo 26
 0 383
0 383
-
Photo 1
 0 397
0 397 -
Photo 2
 0 432
0 432 -
Photo 3
 0 389
0 389
-
 321312 Visitors
 -
- Cosplayer Info
- Costumes Worn
- Costumes Made
- Props
- Wigs
- Favorites
- Videos
- Convention History


Sorry, you must be a registered user of and logged in to view and add comments. Either log in or register now!