

ACParadise Network:
American Cosplay Paradise
American Cosplay Experience
American Cosplay Snapshots
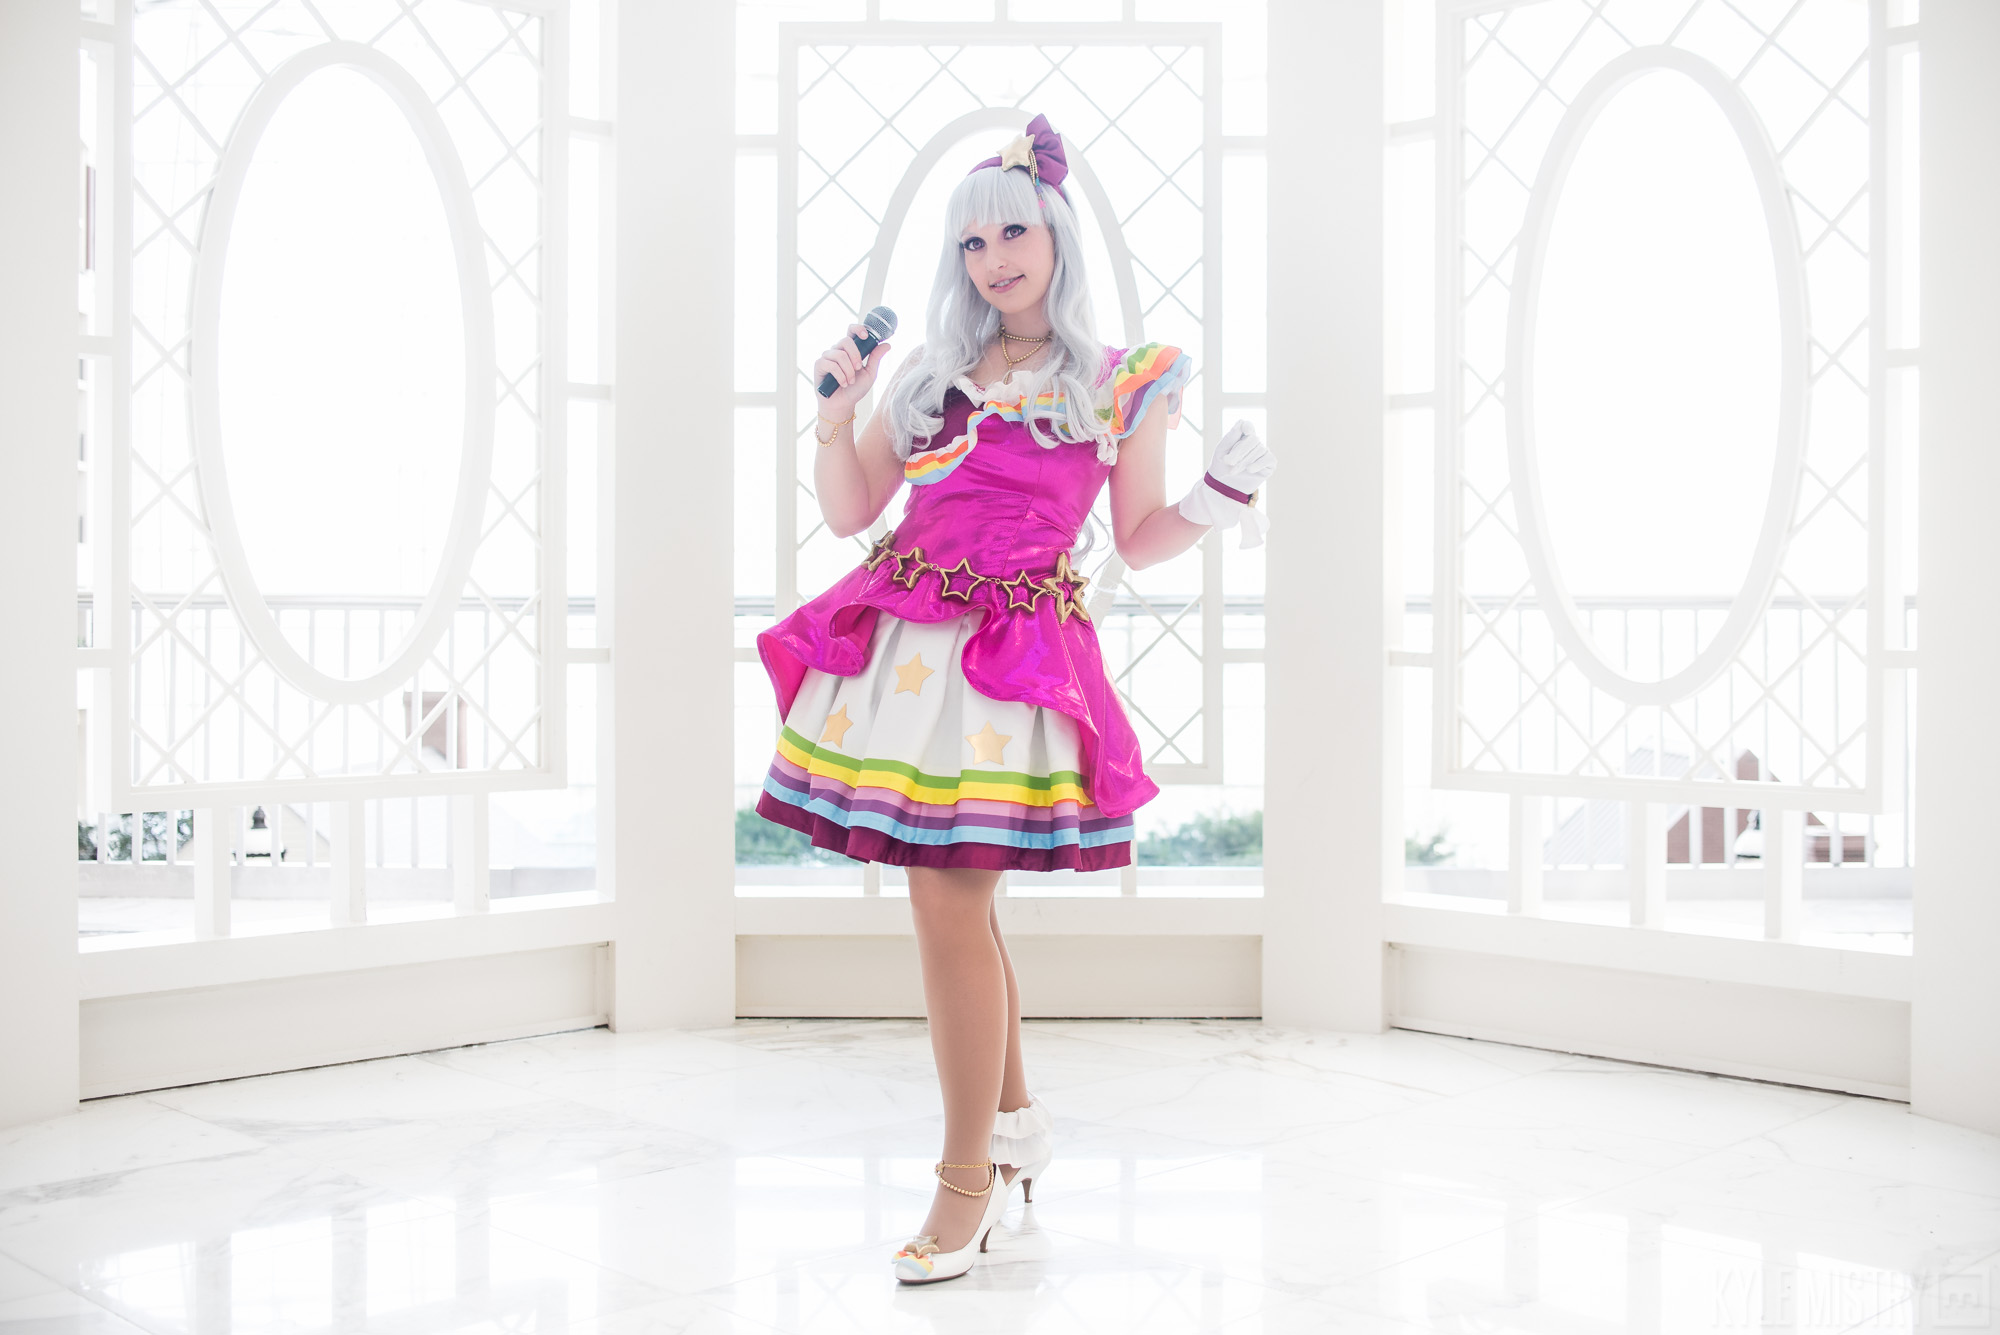
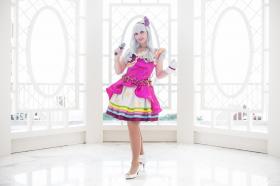
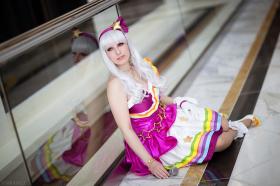
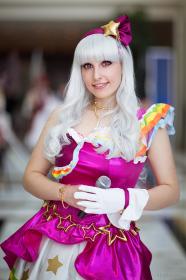
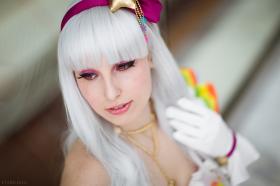
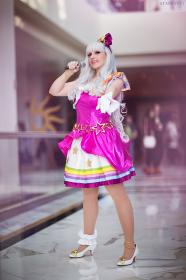
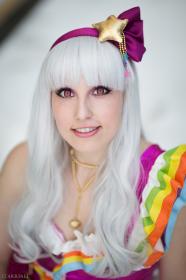
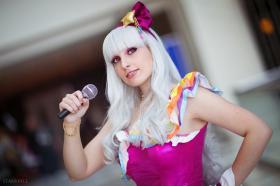
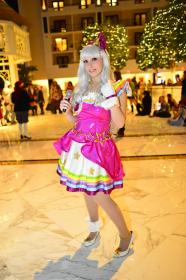
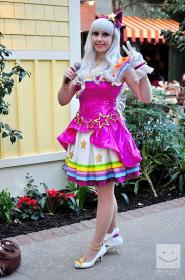
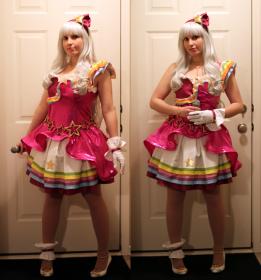
Cosplayer Shark Baroness > Costume of Takane Shijou (iDOLM@STER)
- Most Recent Photo
- 04-12-2014
- Series
- iDOLM@STER
- Character
- Takane Shijou
- Special Variation:
- Shiny TV - We Have A Dream
- Year Completed:
- 2014
- Construction Difficulty:
- Costume worn at:
- Katsucon 2014
About this Costume
- Construction Details:
-
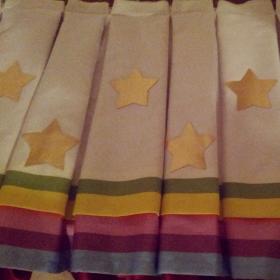
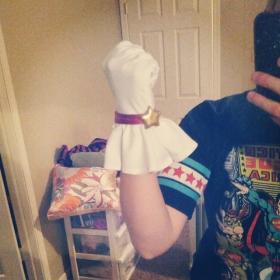
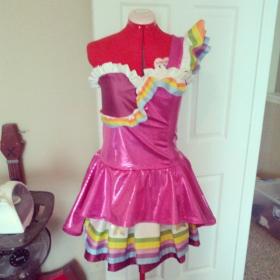
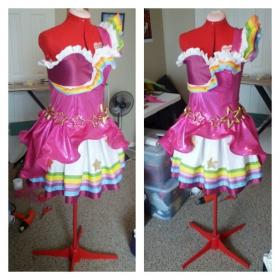
This was my first time making a costume entirely from my own patterning and my first time using a serger! I used fuchsia holographic circle spandex for the main fabric of the bodice and some type of satin fabric I found at Joann's that happened to be the perfect shade for the bottom layer of the skirt, right breast section, and headband. I used white milliskin spandex for the glove and ruffle anklet. I designed the fabric with the various stripes of colors and custom ordered it from Spoonflower.com. My serger made making all the ruffles and sewing the bodice together really easy. I used horsehair braid to get the flowy shape of the bottom of the bodice. The pleated skirt is separate and was made by sewing together three layers of fabric and then pleating. The gold stars on the skirt were made from gold spandex and heat n bonded on.
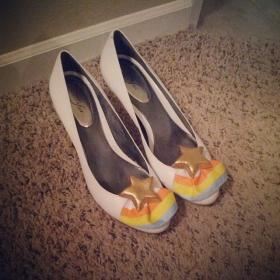
Pieces of the jewelry, star belt, and star shoeclips were made from worbla. I used a mold for the jewelry and shoeclip pieces and I used star cookie cutters to make the belt pieces uniform in size and shape.
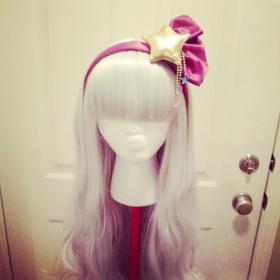
For the headband, I took a plain headband and measured it then made a tube out of fabric to cover it and then sewed up the ends. For the star, I cut out two star shaped pieces of gold spandex fabric, sewed it together except for a small hole so I could add some polyfill and then slipstitched the hole shut. For the beaded parts, I bought some star beads and added them to eye pins to make them into charms. Then I just made strands of beads using stretchy cord, added a crimp bead, and attached the charms. Then I added another crimp bead to the tops of the strands and attached them to a ring. I then sewed the ring to the back of the star with a curved embroidery needle. I also sewed down the strands to the star in some places so that they would hang out more toward the side instead of straight down. Then I sewed together a long rectangle out of the purple fabric, gathered it, folded it in half and sewed it to the gold star, again with the curved needle. Once that was done, I just hotglued the whole thing to the top of the headband.
Wig Details
- Wig Brand
- Epic Cosplay
- Wig Name
- Hera 38" Wavy
- Original Color:
- Silvery Grey
- Styling Notes
- I combined two of the Hera wigs, trimmed the bangs, and shortened the two front curls.
Add a Comment

-
 322995 Visitors
 -
- Cosplayer Info
- Costumes Worn
- Costumes Made
- Props
- Wigs
- Favorites
- Videos
- Convention History


Sorry, you must be a registered user of and logged in to view and add comments. Either log in or register now!