

ACParadise Network:
American Cosplay Paradise
American Cosplay Experience
American Cosplay Snapshots
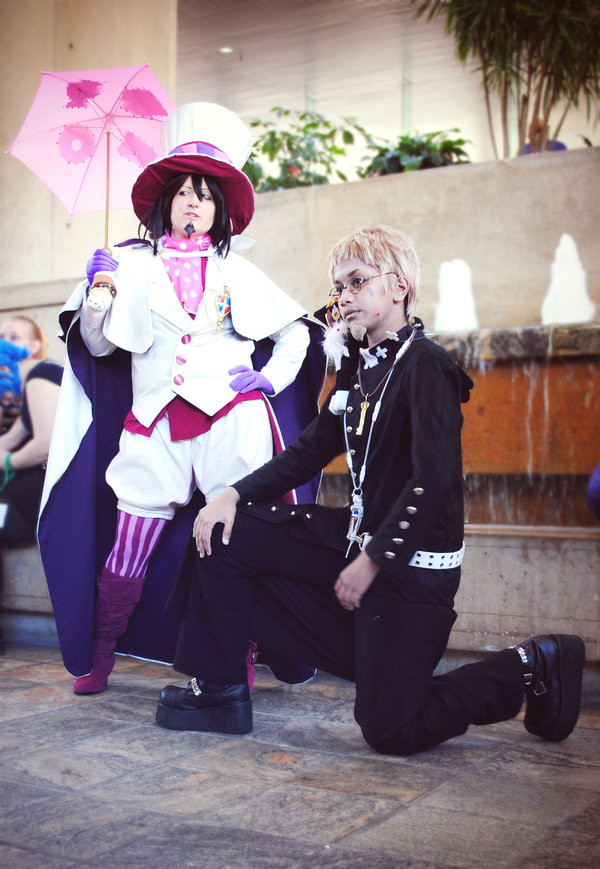
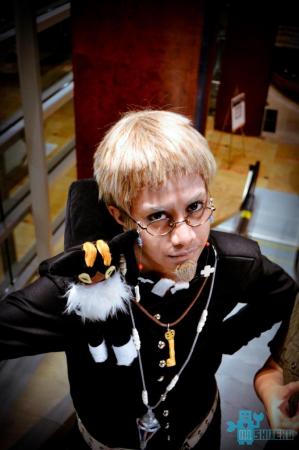
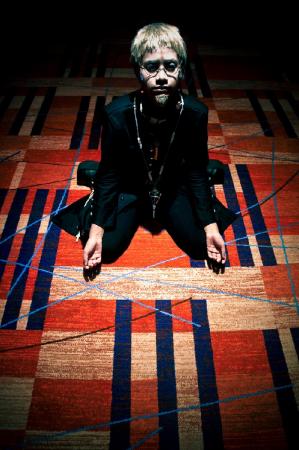
Cosplayer TANIK0MA > Costume of Fujimoto Shirou (Blue Exorcist)
- Most Recent Photo
- 09-14-2012
- Series
- Blue Exorcist
- Character
- Fujimoto Shirou
- Year Completed:
- 2012
- Construction Difficulty:
- Difficult
- Costume worn at:
- Otakon 2011
About this Costume
- Construction Details:
-
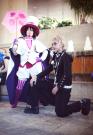
I don't think I can explain just how much I love this character. xD From the moment I saw him, there was just so much of his personality and character design to love, even if certain aspects were simpler compared to other characters in the series.
I made the priest robe from scrap without a pattern. I simply analyzed a blazer I had (meant for men) and went with that. I made sure to add in shoulder pads correctly this time around, and fully lined the entire robe with purple on the inside (my own personal touch ;D).
I already had a pair of black dress pants, and decided to wear platform boots simply because it made the costume hang a lot better. Not only that, but the platforms aren't too high, fitting with the costume particularly well. However, I can switch them out with a pair of dress shoes (meant for men of course) that I have, just in case I want to. :D
The glasses were an old pair I had lying around, but I poked out the glass in them since I did not want old prescription lenses harming my eyes any further. I then made the eyeglasses chain using beads I bought, some painted, and then added in my own hand-made crosses to them.
The exorcist pendant was made fully out of Crayola Model Magic, mainly because it was what I had at the time and it allowed me to have something lightweight around my neck. I spray-painted the pendant with silver metallic paint, and then hand painted the red and blue parts on the front. I also made the beads which are on the necklace that holds the exorcist pendant.
I then made a key (not the best, but not the highest priority since I had other things to do) and managed to find the perfect cross necklace to use for what is hanging on his belt. I then proceeded to paint some of the beads red, and then made the belt. I was going to make the belt out of scratch, but I found that I had the perfect base lying around my house. I cut off the old buckle on it, and then hot-glued the belt around the new two-part belt buckles I had bought from a trimmings store.
To add to the character, I then decided to make Kuro. Believe me, this was an almost horrifying experience, since I decided to do something I hadn't ever done before. Although I have made smaller plush dolls in the past, I had never made one with a wire-skeleton and of a bigger size. It was on my second try that I managed to make a successful body. It was a tutorial (not really a pattern since you have to figure out the shapes of the pieces yourself) that explained how to make a plush by using only four pieces (besides the details to be added on later, like the tail, ears, etc.). After it was made, I stuffed it with around two packs of cotton balls after stretching them out by hand (70 jumbo cotton balls, and around 150 smaller cotton balls) which took a little longer than I thought. Before stuffing it completely, I managed to fit the wire skeleton inside of the plush, and then sewed everything shut. The back of the plush is, however, hot-glued shut since it simply looked better.
After I made the ears and tails (the tails had wire in them as well, connected to the rest of the skeleton), I made the horns, eyes, nose, and paws and simply hot-glued most of them onto Kuro. I then embroidered the lips and mouth, making him seem as though his eyes are closed and smiling. I then hot-glued the patch of fur in the front (he is a Cat Sith after all) and the random line of white fur he has on his front right leg. Everything but the body and patch of fur in the front was made out of felt, including the mini-horns on his head. The body is made out of velvet to give it a soft feel.
After that, I made him a little collar and just had some felt lying around to use as a blanket for Kuro. ;D
As you can see, there was a lot that went into this costume since I cared a lot about the details and worked carefully on everything to make sure everything worked well together. It's one of the costumes I am most proud of, and one of the costumes where pretty much everything (besides pants and shoes) were made by me. :D
Wig Details
- Wig Brand
- Wig Fashion
- Wig Name
- FY04
- Original Color:
- Mixed Blonde
- Styling Time
- Less than an hour.
- Wig Quality Rating
- 5 / 5.00
- Styling Notes
- The hair was easy to style, and all I really had to do was actually chop up the bangs to match the character, which didn't take long. What took a while, however, was actually making the goatee using hairs from the wig itself.
Add a Comment


Sorry, you must be a registered user of and logged in to view and add comments. Either log in or register now!