

ACParadise Network:
American Cosplay Paradise
American Cosplay Experience
American Cosplay Snapshots
Cosplayer PhDPepper > Costume of Cloud Strife (Final Fantasy VII: Advent Children)
- Most Recent Photo
- 05-02-2011
- Series
- Final Fantasy VII: Advent Children
- Character
- Cloud Strife
- Year Completed:
- N/A
- Construction Difficulty:
- N/A
About this Costume
- Construction Details:
-
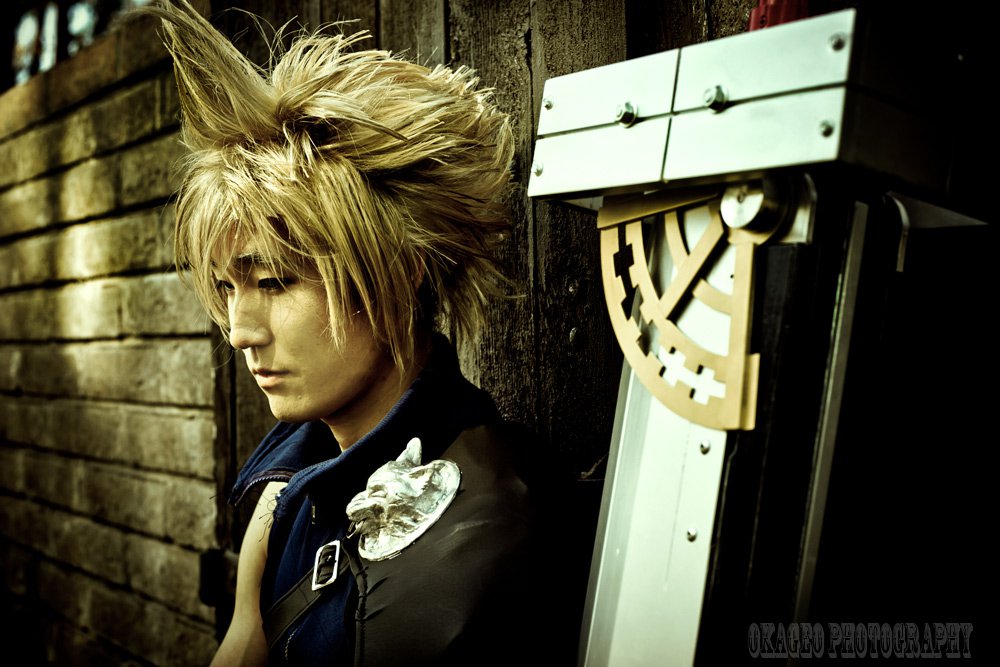
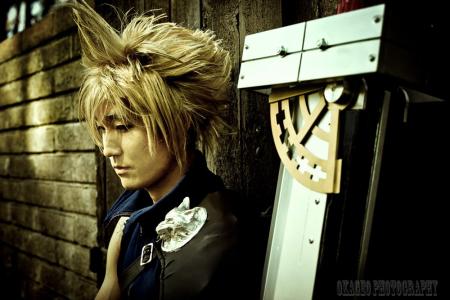
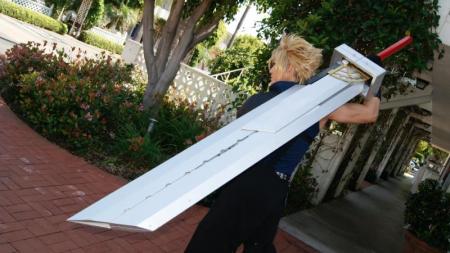
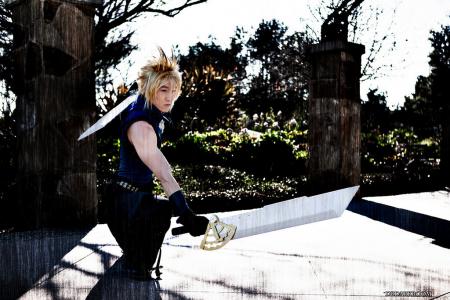
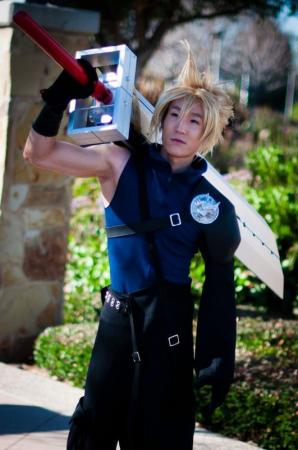
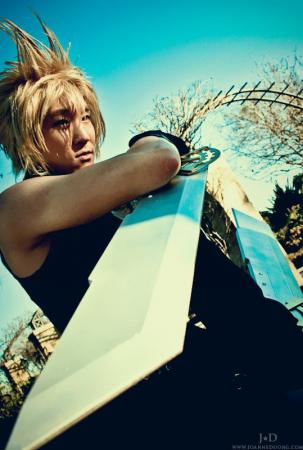
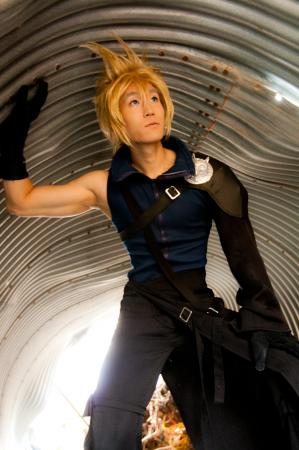
The cosplay itself was mostly made of a polyester suiting material, the material was stitched so that a few pieces of gray colored strands were in the mostly black fabric to give it a slightly worn look. The vest was made using rib knit navy blue cotton. The pauldron base was formed by using wonderflex, and then the wonderflex was sprayed with 3m Super 77 adhesive. The wonderflex was then wrapped with an upholstery vinyl that had the cloth backing removed by using acetone to dissolve its glue, and the underside of the vinyl was also sprayed with 3m super 77 to allow it to adhere to the wonderflex. The pauldron was then machine stitched around the edge to hold the vinyl and wonderflex together permanently. The wolf emblem on the Pauldron was sculpted out of paper clay, then primed with gesso before it was painted with silver acrylic fabric paint from Jacquard. The base of the wolf emblem is actually Wonderflex, with a smaller wonderflex ring that was raised using hot glue. The base was also gesso'd and painted in the same fashion. The wolf Emblem was attached to the base by drilling a few holes into the base of the wolf emblem, then hot glue was injected into the holes, and spread along the base. The hot glue was then heat gunned so that it would self smoothen, and then it was placed on the wonderflex base so that it would permanently adhere. A small hole was cut into the vinyl using a seam ripper, where the wolf pauldron would be mounted, and the base of the wolf emblem was heat gunned so that it would melt and conform to the shape of the pauldron, and since wonderflex adheres to itself, it permanently adhered onto the exposed wonderflex on the pauldron. The sword was crafted by first planning out a blueprint of how the 6 swords would merge into each other. The swords were mostly made of 3-ply plywood in order to give it strength while remaining fairly light. Some sharp angle cuts had pine inserts, since plywood has a tendency to not leave smooth beveled cuts, and also for structural integrity since the swords were actually designed to be hollow inside to reduce weight. In order to cut the bevels, an electric hand planer had to be modified so that it connected to a track assembly and rolled along a wheel with an adjustable height so that the 30 degree bevels could be made. The handles of the swords were made of oak because it needed the added strength, and the main sword's handle was also covered in PVC. The locking mechanism for the swords were custom fashioned by using sheet aluminum, and nickel rivets. The smaller swords on the side had a hinge custom fashioned by using aluminum sheeting, along with the hilt quarter circles being cut using aluminum sheeting because they needed to be structurally stronger. The sword blades were made of 7-ply plywood, and the handle area was chiseled away in order to allow the hinges to mount flush with the sword. The crafting time of the wig was approximately 30hrs due to transfering wefts from one wig to another. The crafting time of the sword was approximately 160hrs, not including the time required to plan it. The crafting time of the costume itself was approximately 20hrs, since the costume design is fairly simple. and the pauldron was approximately 4 hrs worth of this time due to sculpting and forming the pauldron.
Wig Details
- Wig Brand
- Cosworx / Cosplay.com
- Wig Name
- Wisp
- Styling Time
- 30hrs
- Styling Notes
- The thickness of the wig was created by using two wisp wigs from cosworx. They were in 2 different shades to give the hair different colored strands. The process of removing wefts from one wig and transferring it over to the other wig by hand was a time consuming process. Around half the wefts in the back were stitched in to point upward to help the hair stand up more too.
Add a Comment


-
 277177 VisitorsAce's Pick: 01/2011
 -
- Cosplayer Info
- Costumes Worn
- Costumes Made
- Props
- Wigs
- Videos
- Convention History


Sorry, you must be a registered user of and logged in to view and add comments. Either log in or register now!