

ACParadise Network:
American Cosplay Paradise
American Cosplay Experience
American Cosplay Snapshots
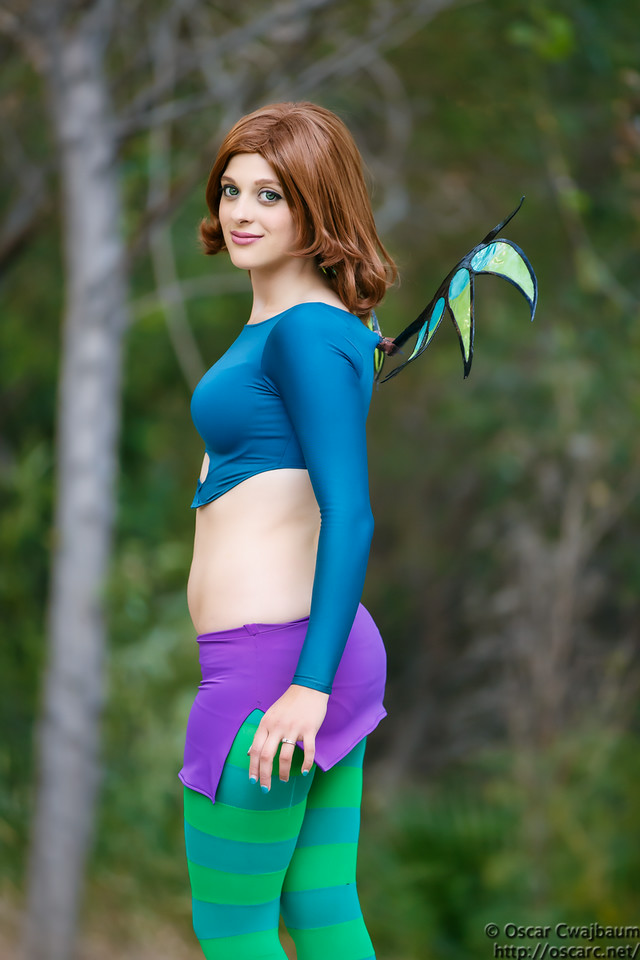
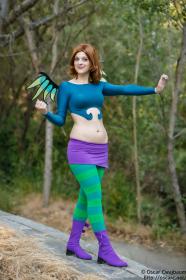
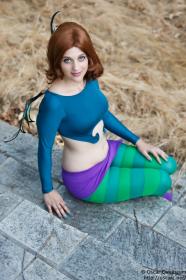
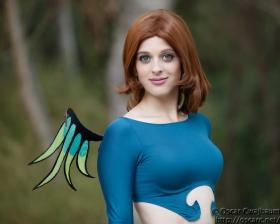
Cosplayer Verona > Costume of Irma (W.i.t.c.h.)
- Most Recent Photo
- 08-02-2014
- Series
- W.i.t.c.h.
- Character
- Irma
- Year Completed:
- 2014
- Construction Difficulty:
- Normal
- Costume made by
- Faye Lynn
- Wig styled by
- Faye Lynn
- Prop made by
- Faye Lynn
- Costume worn at:
- FanimeCon 2014
About this Costume
- Construction Details:
-
A word from Araila:
I went with the comic book style so the hardest part was finding the right color fabric. The shirts and skirts were easy enough to sew.
The tights were the hard part. I cut up two pairs of tights to create the stripes the problem was the stitching made them so much smaller than they were originally as just tights. So I had to actively stretch the tights more and more as I sewed up the leg.
The wings are made of two layers of worbla with laminated tissue paper. Then primed with wood glue and painted with glossy acrylic paint. They were mounted with a U-shape harness and clear straps that all went on under the shirt. There are two small holes in the back of the shirt for the wings to attach through.
Irma's wig was simply cut and curled.
- Extra Costume Details by Faye Lynn
-
Overall the skirt and shirt were easy to sew except for all the edges. I didn't have a walking foot at the time and had to use disprovable stabilizer for the edges which was a total pain. I tried to use the rolled hem foot on my machine but I ended up turning a pinning all the edges by hand. The skirt has a matching built in panty for modesty and to hold the skirt up invisibly. The swirls on the skirt are held down with double sided tape and It Stays! body glue. The tights were the most difficult to sew. I took two pairs and cut them into strips and sewed them back together into one pair. Despite using my tricot stitch the tights had trouble stretching. I had to stretch the material as I sewed to get more length/room in the stitching. The boot covers were simply hot glued to the base shoe.
- Extra Prop Details by Faye Lynn
-
The wings were very labor intensive. I started with tissue paper and glued the two colors together. I then lamented them in my home machine. I cut out two pieces of worbla and first heated them up to sandwich the lamented pieces in between and adhere the worbla together. Then I heated it again to bevel and round edges. Finally I heated it put a overall curve in the wing. I drilled holes (with help) to put in pins in so the wings wouldn't spin in their sockets. Finally some paint and they were done!
- Personal Thoughts:
- It was totally a fun nostalgia bomb! It was super nice when people who did recognize me/us. They were super excited and freaked out!
The hardest part was navigating crowds with the wings.
Wig Details
- Wig Brand
- AnimeStuffStore
- Wig Name
- Kaori
- Original Color:
- Auburn Brown
- Styling Time
- 6
- Styling Notes
- Hot water curled ends of hair with rollers. Cut with razor/scissors.
- Wig Review
- A little thin on top layer in back/crown area. To many short bulking fibers. Very soft. Good variety of color on fibers. Part messy.
- Extra Styling Details by Faye Lynn
-
I cut the wig into layers and then put edges in rollers. I gave the rollers a hot water bath and then it let dry naturally. I worked in a little volume with hairspray and a dryer.
Add a Comment


 Upgrade Cosplayer
Sorry, you must be a registered user of and logged in to view and add comments. Either log in or register now!