

ACParadise Network:
American Cosplay Paradise
American Cosplay Experience
American Cosplay Snapshots
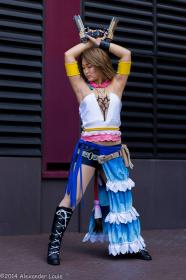
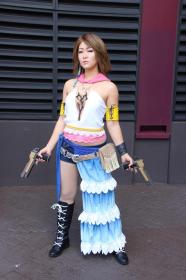
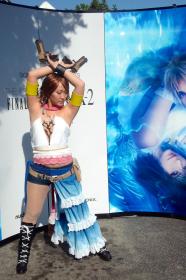
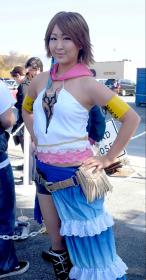
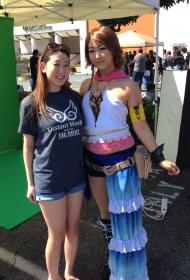
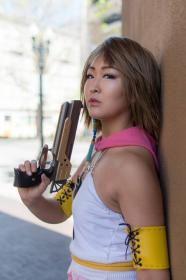
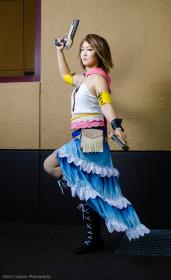
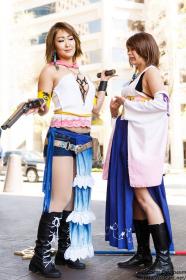
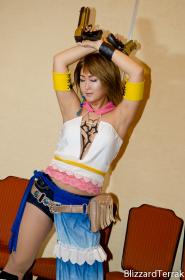
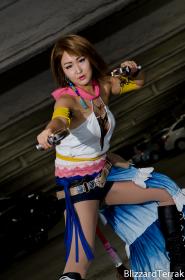
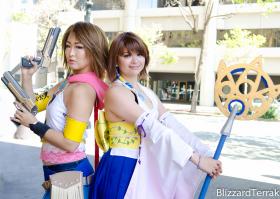
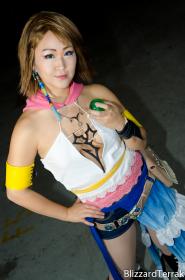
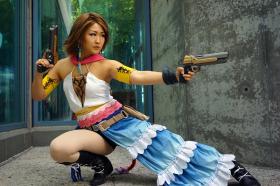
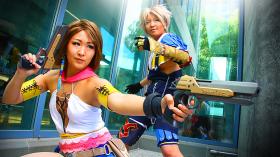
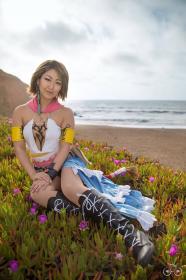
Cosplayer Crystalike > Costume of Yuna (Final Fantasy X-2)
- Most Recent Photo
- 11-27-2014
- Series
- Final Fantasy X-2
- Character
- Yuna
- Special Variation:
- Gunner Dress Sphere
- Year Completed:
- 2014
- Construction Difficulty:
- Difficult

About this Costume
- Construction Details:
-
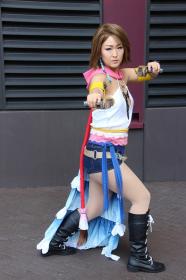
Hood fabric from Britex Fabrics in San Francisco, it's like this pink thick suiting fabric. The hood pattern was based off of one of my own hoodies, and the white strings holding the shirt are strung through the inside of the hood and come out via eyelets behind my neck.
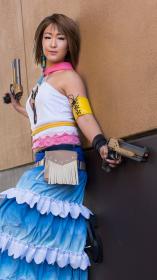
The shirt is made of two layers of white jersey knit stretch material, and the ribbed fabric is from a ribbed white sweater found in Goodwill. The white lace was from Joanns and chopped up to resemble her shirt lace more, and the pink lace was ripped off an old shirt of mine and was backed with leftover pink fabric from the hood. The shirt closes on the right side via big silver hook and eyes. The belt and pouch are made from a tan pleather fabric from Joanns, with light cream pleather used for the fringe.
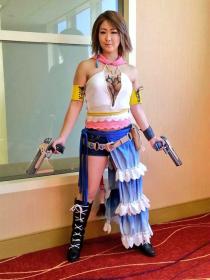
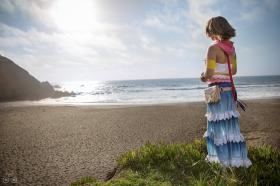
The sideskirt is made from this blue to white gradient fabric I bought from eBay a long time ago (the store is discontinued sadly), but I had to redye the gradient darker anyway. The strings on the side of the sideskirt are blue double fold bias tape sewn shut, leftover from my Kill la Kill Satsuki costume.
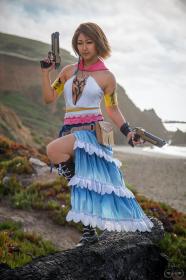
The yellow armbands are made of yellow pleather, with the black stitching handstitched with the help of a thimble, and the eyelets were handclamped and originally silver, but painted black to match the art.
The wristwrap is made of black pleather around black felt, with the detailing done with a tiny zigzag stitch, and held closed with velcro.
Hairtail from KairiG cosplay. Earring made by me back in 2005 when I did commissions for the Yuna earring. Glad it's lasted so long!
The necklace was gifted to me by my friend Haetae, thank you so much!
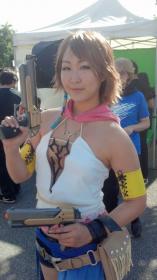
The PS2 game controller guns were a Christmas present from Bart. Dude, I can't thank you enough. I still think about how you surprised me with these gorgeous things and I tear up. ;_; I'm so lucky to have such a good friend.
Shirt, hood, sideskirt, belt, pouch, wrist wrap, and armbands are all made from scratch by myself.
The Zanarkand symbol is Worbla's finest art, hand molded.
Boots are from Aliexpress, and the original black laces were removed, and switched out for white shoelaces. - Personal Thoughts:
- This has been my dream cosplay costume ever since I first started cosplaying back in 2005.
I waited until now to make it because I knew that some parts were too difficult for me to do back in the day, and now I finally have the skills, knowledge, and access to materials that would allow me to make this costume to my idea of perfectionism.
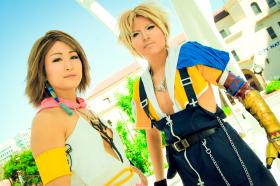
I debuted this costume at the Final Fantasy X/X-2 HD Remaster Launch and signing event at the Gallery Nucleus in Alhambra, CA, and yes I drove down with Hybridtwist for this event. I gave myself roughly a month to make the costume, and for the launch I finished everything, but I'm working on some updates and tweaks to get the costume to fulfill my dream.
Gunner Yuna Version 2.0
Changes made from last version: new yellow armbands, curved Zanarkand symbol slightly, new eyelet lace on the side skirt, new wig, more makeup contouring, new pouch fringe, belt decoration details.
New Wig; The biggest issue I had the first time I wore this costume was my wig. The wig was a Scruffy L from Cosworx purchased back in 2007, and was thin and too flat for Yuna.
I bought a Jareth from Arda hoping to use it for a new wig, and found myself with a monstrously voluminous, incredibly thick wig that worked amazingly well, minus the skin top and lace front that other wigs had. I’m impressed with the quality of the fibers and how I had to barely trim the layers that were already in the wig, and as always, love the large wig-band that fits my big head. The wig was rush styled the night before Kraken Con in about 2 hours, and even the rushed styling resulted in a pretty good wig for Yuna. I want to go back and wash it and restyle it from the beginning to get the more defined layers because the wig at KrakenCon sure messed it up. The difference is immense with the new wig.
Armbands: the old armbands were made of a single layer of yellow pleather, and were alright, but didn’t have quite the volume and thickness that I wanted. I bought new yellow marine vinyl pleather from Joanns, and layered it on the inside with 3mm craft foam and thick interfacing. This gave the armbands more stability and the eyelets no longer look flimsy. Redoing the black stitching on the tops and bottoms of the armbands by hand was tedious, but much faster this time around. They might look exactly the same as the old armbands in pictures, but these new armbands are so much better.
Zanarkand symbol: This time I heated up the worbla symbol on the bottom, and slightly curved it inwards to the inside so that I wouldn’t have strange bunching of my shirt.
Yellow waistband: originally I had used this gold satin cord, but it was so thin and unnoticeable that I immediately swapped it out for thick yellow cording from Joann’s. This time the waistband matches the armbands more and resulted in a more accurate look.
Eyelet lace: I bought this cute scalloped eyelet lace from LaceHeaven for the first run of the costume, and sewed an extra piece of white ribbon onto the top with a decorative ladder stitch, but after looking at it, decided I wanted a more accurate, deeper scalloped lace for the side skirt. I seam ripped the original lace off, bought new lace with a nice floral design and less eyelets, added the decorative stitch, and hand gathered and hand sewed the tiers to the side skirt. I’m much happier with this new eyelet lace, and the floral detail is subtle but still shows up in pictures and in person. The deeper scallops really do make a difference in the overall appearance.
Pouch fringe & belt details: The old stuff was this canvas that I cut strips into and fray checked, but by the end of the gallery exhibit and game launch, the canvas had frayed and wrinkled with the many times I opened it. I ripped the canvas off the bag, bought light tan pleather, cut strips into that, and glued it to the pouch with e6000. The pleather should have been my first choice, it’s sturdy, sits in place, and won’t fray. The two round silver and turquoise decorations had pieces of worbla added to the edges for a chunkier 3D look, and really adds to the costume to make it more accurate to the design.
Add a Comment
Photos
-
Photo 1
 0
0  570
570 -
Photo 2
 0 784
0 784 -
Photo 3
 0 618
0 618 -
Photo 4
 0 484
0 484 -
Photo 5
 0 598
0 598 -
Photo 6
 0 456
0 456 -
Photo 7
 0 620
0 620 -
Photo 8
 0 566
0 566 -
Photo 9
 0 529
0 529 -
Photo 10
 0 553
0 553 -
Photo 11
 0 484
0 484 -
Photo 12
 0 582
0 582 -
Photo 13
 0 560
0 560 -
Photo 14
 0 484
0 484 -
Photo 15
 0 514
0 514 -
Photo 16
 0 538
0 538 -
Photo 17
 1 544
1 544 -
Photo 18
 0 495
0 495 -
Photo 19
 0 539
0 539 -
Photo 20
 1 626
1 626 -
Photo 21
 0 502
0 502 -
Photo 22
 0 422
0 422 -
Photo 23
 0 415
0 415 -
Photo 24
 0 512
0 512


Sorry, you must be a registered user of and logged in to view and add comments. Either log in or register now!