

ACParadise Network:
American Cosplay Paradise
American Cosplay Experience
American Cosplay Snapshots
Cosplayer NiGHTmaren > Costume of Garnet til Alexandros the 17th (Final Fantasy IX)
- Most Recent Photo
- 08-15-2017
- Series
- Final Fantasy IX
- Character
- Garnet til Alexandros the 17th
- Special Variation:
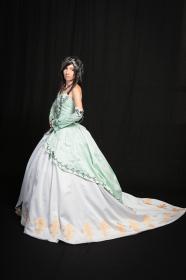
- Ceremonial Gown (In-Game Render)
- Year Completed:
- 2014
- Construction Difficulty:
- Difficult
- Costume worn at:
- Anime Weekend Atlanta 2014
About this Costume
- Construction Details:
-
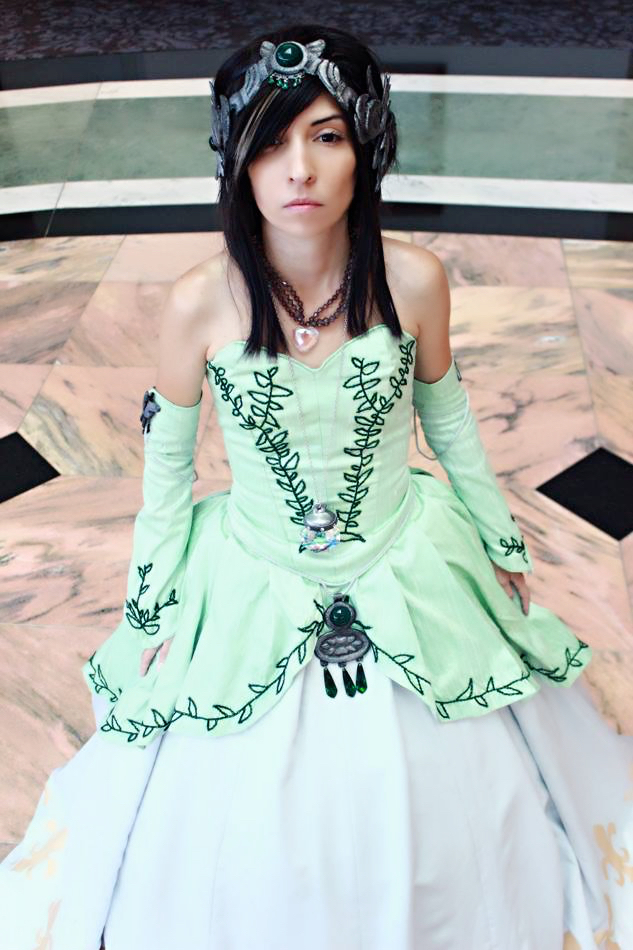
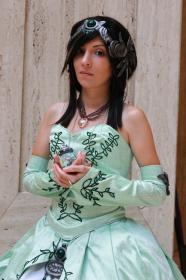
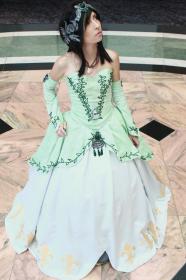
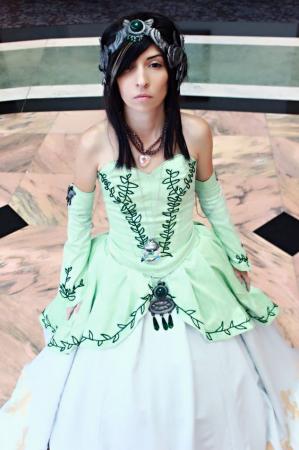
Bodice – The bodice was constructed by altering a Simplicity pattern to suit my own measurements. A mock-up was made to make those alterations. The outside fabric is silk dupioni in Winter Green from The Silk Baron. It is flat-lined in coutil for stability and shape. I hand-embroidered the leaves and vines with embroidery floss, using the chain stitch method. The bodice is fully lined with cotton. Boning channels were sewn into the lining – I inserted spiral steel in the curved ‘princess’ seams and flat steel in the rest of the seams. The bodice is faced on the top and bottom with cording that I custom-made using the same dupioni fabric, which creates a finished edge and also adds to the stability of the garment. The back has grommets hammered in and the bodice laces up to fit. A modesty panel was included in the back, as well.
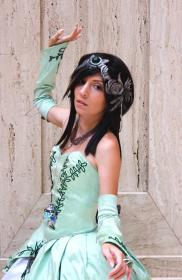
Gloves – the ‘gloves’ were custom-patterned, I made a few mock-ups until I was satisfied with how they fit and were shaped. Characters in the game have exaggerated forearms so I did make sure to mimic that silhouette while still being flattering to the eye. I used the same silk dupioni I used for the bodice and top skirt. They are hand-embroidered (chain stitch method) with green embroidery thread with the vine and leaf details. They are faced at both ends and serged seams, so that there are no raw edges. An elastic loop is handsewn to fit around my middle fingers to keep them in place.
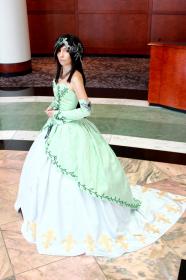
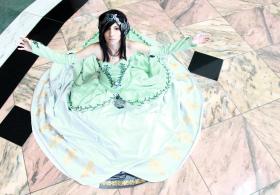
Hoopskirt – the hoopskirt underneath the three layers of skirts gives them shape. Garnet’s gown is clearly an elliptical shape so I went with Truly Victorian’s elliptical hoop skirt pattern to create my own. 36 yards of boning went into this hoop skirt. This is a 12-row pattern – the four bottommost rows of steel boning are encased in a ‘bag’ of fabric with channels sewn into them that the boning slips through. I used calico fabric for this bag, and the boning overlaps in the front and is stitched closed by hand (the rest was sewn with machine). The four rows above that also go full-circle around and are encased in boning casings, and the four above that are only half-circles in the rear of the hoop skirt, also encased in boning casings and with the edges of the boning finished off on the inside of the casing with boning tips so they won’t poke through. The support system is put together with a fully functional belt, with a fabric crescent in the rear that the back and side back vertical ribbons are attached to. All rows are attached to these ribbons and were hand-sewn on. There are more ribbons on the interior between the four top rows that help distribute the weight towards the back and also adjust the width of the hoop skirt.
Skirt Mock-ups – two mock-ups were made for the three skirts. The first mock-up was used for both the bottom and top layers, as I could easily mark where I wanted the hemline for the top skirt to be and use that pattern after I was done cutting out the pieces for the bottom skirt. The second mock-up was for the middle train, which had to be figured quite a bit longer with most of the length in the back, and also feature the ‘parting curtains’ look in the center front. Both mock-ups were draped over the cage skirt and marked and cut accordingly to suit the correct shape and hemline.
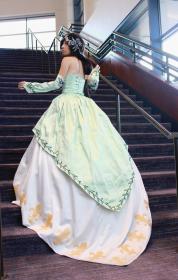
Bottom Skirt – the bottom-most skirt is white cotton, with the center front panel being silver Casa satin flat-lined in the white cotton. The edges were serged on the inside seams as well as on the hem before being flipped up and top stitched. Beaded trim was hand-sewn to the center front panel. It’s a detail that is very hard to make out in the reference for all panels except for the center back, which is hand gathered. The skirt features a traditional Victorian placket in the back instead of a zipper. The skirt is attached to a waistband that closes with hooks and eyes.
Middle Skirt – The middle skirt has a ‘parting curtains’ appearance in the front – I gave it a center front seam to give it the proper look. I used a pearl gray, medium weight satin that is not prone to wrinkle, since it would be trailing on the ground. It is fully lined with white cotton. The gold fleur de lis on the border are gold satin appliqued on – I picked a fabric that would not lend to fraying and look clean. The skirt is gathered and pleated at the top just like the bottom skirt with a waistband with hooks and eyes, and the back is, again, a placket. I used the same waistband that was used for the bottom skirt so they would line up nicely and never ‘shift’.
Top skirt – The top skirt fabric is the same dupioni silk used for the bodice and ‘gloves’. It is fully lined in that same fabric. The skirt is cut to be short in the front and long (to the ground) in the back. The silhouette was figured out during the mock-up stage to be sure I got it look correct. The border features hand-embroidered leaves on a vine (chain stitch) all around the border. It is also hand-gathered and pleated onto a waistband with a hook and eye closure, with a placket in the back. It is set slightly higher than the other skirts.
Drawers (underpants) – I made a pair of drawers for underneath the skirt to complete the set. They are made of white cotton and serged along the edges and sewn up. The waistline is gathered, and the bottom of the pant legs has four sets of horizontal pleats, and eyelet sewn on to the edge. The waistband buttons in the back.
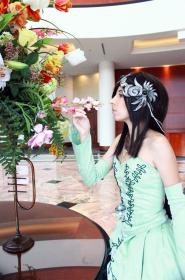
Jewelry – I used the same method for the crown, arm pieces, barrette, and bodice ‘dangle’ – the Worbla and EVA foam sandwich method is what I used to create raised surfaces and give dimension to the pieces. All pieces were patterned on card stock and paper before being transferred to the craft foam and sandwiched between two pieces of Worbla according to how I wanted them to look. I used a heat gun to heat the Worbla so it would be malleable. Some pieces were bent (like the arm bands) to shape. The green gems took a long time to find an exact match for in different sizes and shapes, but were finally purchased on Etsy. The large necklace has a ‘crown’ made of Fimo clay and Worbla and rhinestones for detailing. All of the jewelry pieces were primed and painted. I used jump rings when necessary to attach dangling gems. Silver twisted cording was used in place of chains for most pieces involved (aside from the large necklace)so they wouldn’t tangle or get stuck on anything/snag the wig or fabric. The smaller necklace was hand-strung with three rows of silver bicone beads and monofilament strands, and has a closure in the back. The focal pieces for both necklaces are Swarovski sun catchers. The crown is perched on a headband so it will stay on – I can opt to cover it up with the wig fibers but it usually blends in well even without doing that.
- Personal Thoughts:
- I got into FFIX late - as in, I first played it the fall of 2013. So pretty late, but better late than never! :D When I saw how the gown looked in-game (the render version) and not in the cutscenes, I knew I had to make it! I went into this project knowing that it would be a huge under-taking, but I was determined to bring my vision of this dress to life. Instead of the CG dress that most people go by as a reference, I went with the in-game dress that originally drew me in, which is a bit 'poofier' and has different details and accessories than in the CG art, as well as having skirt layers that are obviously different shades of color. I knew that making this costume according to that version would be 'risky' and some may go so far as to call it inaccurate because of the much more popular source showing it being white, but it's the version I adore and darn it, I had to make it! I love the color scheme and I love that it makes the whole get-up look at lot less 'bridal'. This costume was draining to make, but not too difficult - just took alot of effort and time. It's a lot harder to wear this than it was to create it, due to the sheer size of it.
Wig Details
- Wig Brand
- Arda Wigs
- Wig Name
- Jareth Long
- Original Color:
- Natural Black
- Styling Time
- 6 hrs
- Wig Quality Rating
- 5 / 5.00
- How was the wig colored?
- Wefting Highlights in Dark Ashe Blonde
- Styling Notes
- I took a Jareth Long in Natural Black as my base, and wefted in dark blonde for the highlights. The rest was trimmed and styled as needed.
- Wig Review
- This is a fantastic style for anytime you need bangs with volume and layer to them! Or for spiking. Highly recommend this wig.
Add a Comment

-
 1778191 VisitorsAcy's Pick: 08/2014
 -
- Cosplayer Info
- Costumes Worn
- Costumes Made
- Props
- Wigs
- Favorites
- Videos
- Convention History


Sorry, you must be a registered user of and logged in to view and add comments. Either log in or register now!