

ACParadise Network:
American Cosplay Paradise
American Cosplay Experience
American Cosplay Snapshots
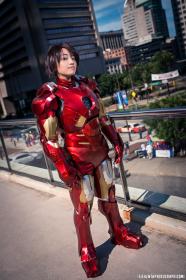
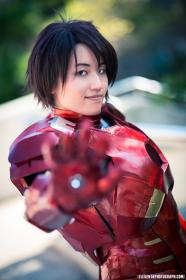
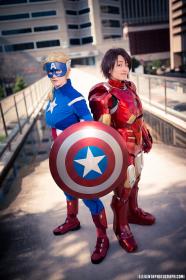
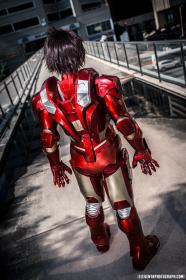
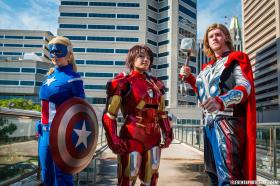
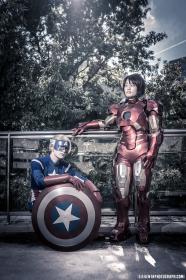
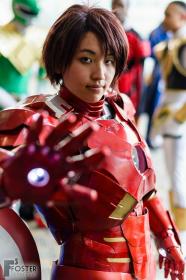
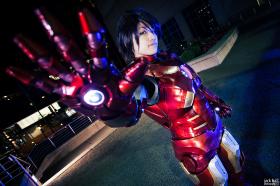
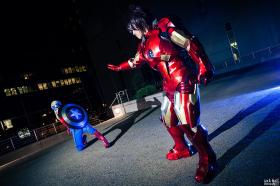
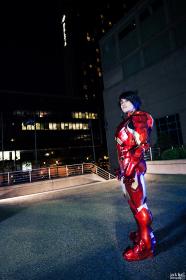
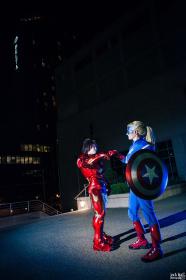
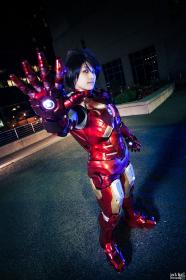
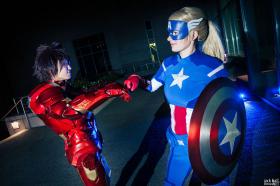
Cosplayer Kimmy > Costume of Iron Man (Avengers, The)
- Most Recent Photo
- 08-23-2015
- Series
- Avengers, The
- Character
- Iron Man
- Special Variation:
- rule 63
- Year Completed:
- 2013
- Construction Difficulty:
- Difficult
- Costume worn at:
- Otakon 2013
- Otakuthon 2013

About this Costume
- Construction Details:
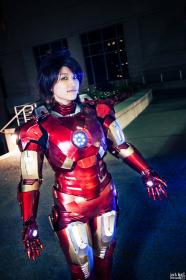
-
I used Darkside501st's pepakura template as a base for my suit. I had to rescale it to fit me and I modified a few parts for simplicity's sake. I also had to draft a few parts such as the neck and metal middle layer. Once I had a template that was scaled appropriately, I constructed the suit using craft foam. Most of the larger pieces are made out of 6mm craft foam, while everything else was done using two 2-3mm sheets glued together.
The foam pieces were then coated in white glue 3 times in order to seal the foam. I then coated the pieces in 2-3 layers of resin in an attempt to harden them. I don't know if I just wasn't applying enough of the resin, but I found it didn't really help in making the pieces more solid and had to papier macher some of the insides of the larger pieces to make them more durable overall.
I was a crazy person and decided to paint the red parts of the suit using Metalcast paint which is an enamel auto paint that cost an arm and a leg. Montreal is not an ideal place to be painting this since it requires humidity of 50% or less to paint. Thankfully Steph's mom was kind enough to let me use their garage with the dehumidifier on (so many thanks to both of them - Personal Thoughts:
- Never again will I attempt to make a full suit of armor in three and a half weeks. >.>
I can't move in the suit to the extent that I've essentially got two poses to work with LOL. Also, the top of my abs kept falling out because I was an idiot and didn't glue them down. Eventually I just said "screw it" and just walked around without it.
Wig Details
- Wig Brand
- Lucaille
- Wig Name
- APH Austria
- Wig Quality Rating
- 4 / 5.00
- Styling Notes
- The ahoge was taken out. The fibers were flying all over the place, so I did a quick pass of the wig to straighten it a bit. The bangs were then cut and the back of the wig was trimmed.
Add a Comment


Sorry, you must be a registered user of and logged in to view and add comments. Either log in or register now!