

ACParadise Network:
American Cosplay Paradise
American Cosplay Experience
American Cosplay Snapshots
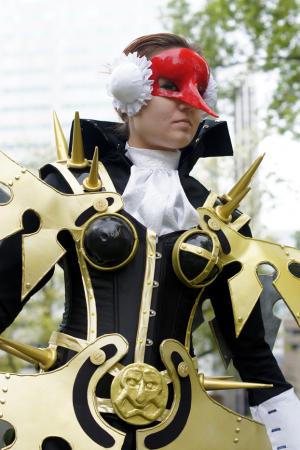
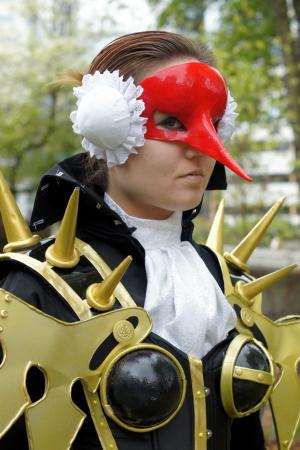
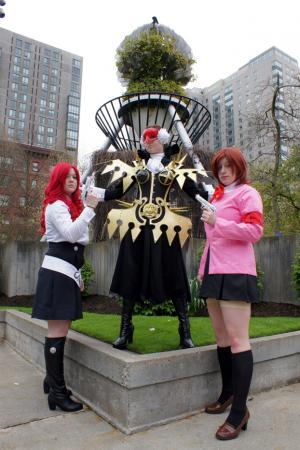
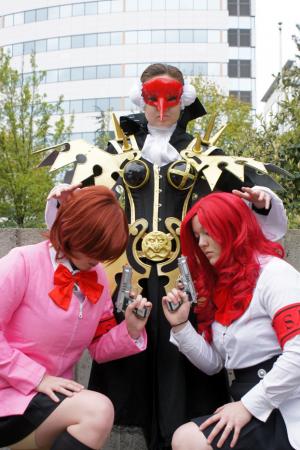
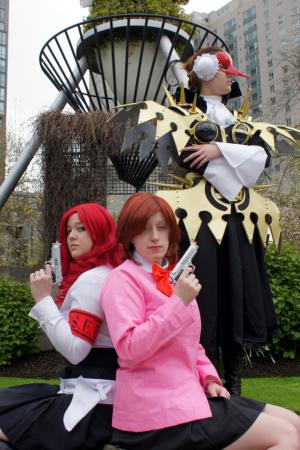
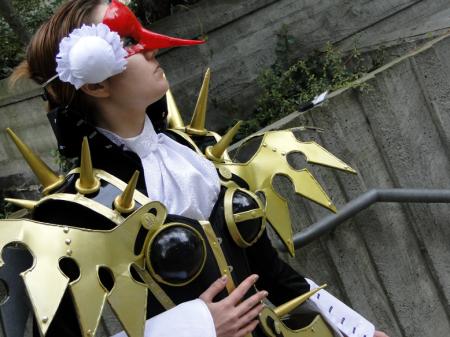
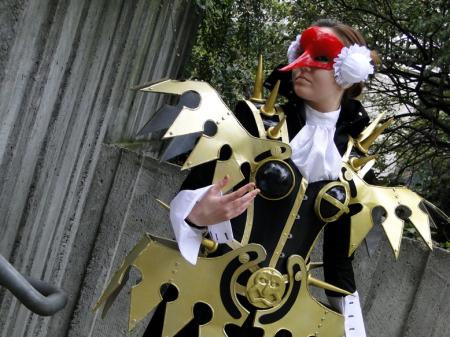
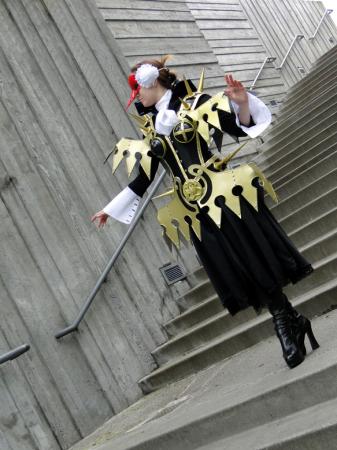
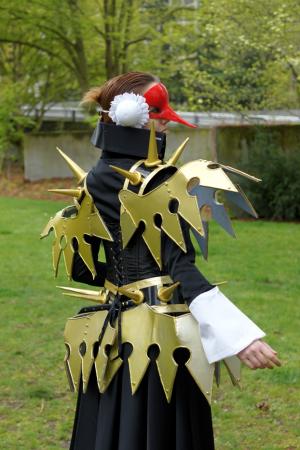
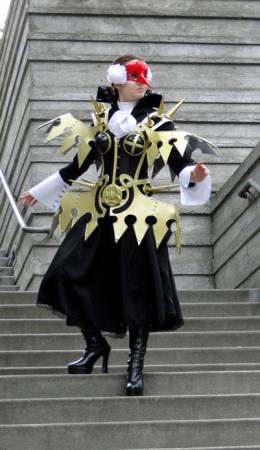
Cosplayer CelestialShadow19 > Costume of Artemisia (Persona 3)
- Most Recent Photo
- 04-04-2010
- Series
- Persona 3
- Character
- Artemisia
- Year Completed:
- N/A
- Construction Difficulty:
- Difficult
- Costume worn at:
- Sakura-con 2010

About this Costume
- Construction Details:
-
First off this is the first and last major armor project i will ever do! It was such a pain in the rear to create that I never want to relive the nightmare of making such painstaking gravity defying shapes. I`ll stick with fabric only cosplay from now on lol. I have always wanted to do a Persona cosplay but it all came down to what series. I have followed the game since it first came out of PSX. Personally I love persona 2 the best but I figured that most people who like persona now do so because of persona 3 and 4. I felt that 3 had the more creative persona designs so I went with that game. Then it came down to what character, well I could either go as a giant gold fish tank looking creature (juno) a giant cow (isis) or a spikey armed goddess of destruction. I`ll take the spikey armed Goddess of destruction please! This costume started out as a ebay won corset as the base. I hand made the boob armor from foam balls that i covered with gloss sealer, accented with resin clay (only sold here in japan, works great to make faux armor) hand painted then glossed over a second time. I sewed gold bias tape down the front and used fabric paint to to the small bead lines down the stomach. The armor on the shoulders and hips is made from industrial foam, not craft foam because its far too flimsy and I needed something that could hold a complex shape but be flexible so it won`t smash to pieces in my luggage, covered over with polystyrene and then riveted onto the corset. I went though a whole bag of rivets to do all the detailing work @_@ The spikes I initially made from paper clay but when it dried it didn`t have a smooth finish so i had to pull something out of my rear to fix it and not waste all the spikes I had made. So i covered it with craft paper and then glossed it over with the same foam sealer I used on the breast pieces to make it waterproof and smooth. The ring bases one each spike is made from resin clay. Attaching the spikes was the most challenging part. I tried about 4 different types of glue to make them stick to the polystyrene and almost non of them worked except deco glue for cell phone decorations, of all things =P, that type of glue is meant to be used on slick surfaces. In fact it worked almost too well. I had to re arrange the spikes after it had dried and it took me and a pair of pliers to get them off! The Mask is also made from resin clay that I molded onto a foam dummy head to make the face shape and let it cure over night on the dummy. Once it was dried and had retained its shape I hand painted it with red acrylic and gave it a gloss coat. The buns at the side are foam balls covered with satin and then trimmed with cotton eyelet ruffles. The whole thing holds onto my head by elastic band. According to the concept art for this character the mask should actually be a helmet type thing that goes all the way across the top of my head but it was mighty uncomfortable to wear it like that so i chopped the top part off. When I wear this for Sakuracon 2010 I will just do something nice with my hair to make up for it. So much time and engineering went into creating this costume that i suffered from cosplayer burn out half way through it because I had to stop and scratch my head so many times while making it asking myself `how the hell do I make that?????` Not to mention remaking the armor twice becuase I screwed up on the design *Dooh!* Yeah i`m pretty sure I burnt a new hole in the Ozone layer with how much spray paint I had to use on this, seriously I went through about 7 cans.....
- Personal Thoughts:
- This will be worn at sakruacon 2010 april 3rd.
Add a Comment
-
 1500952 VisitorsAcy's Pick: 08/2018
 -
- Cosplayer Info
- Costumes Worn
- Costumes Made
- Props
- Wigs
- Favorites
- Convention History


Sorry, you must be a registered user of and logged in to view and add comments. Either log in or register now!